Saturday, 14 May 2011

Rosebud Fudge Candy Bouquet - Sugar Overload & Secret Confession


Blogger has been down for a couple of days and I've lost some draft posts I was working on. I had intended to show you a few other things before letting you see my edible bouquet - but am not really in the mood for retyping stuff I've already done.

Still - I'm sitting on the sofa doing my blog post, looking out at an almost full moon with a big mug of tea and a candy fudge pop..... The house is in silence. Oliver is asleep and Steve is away camping. I've got the luxury of bed waiting for me upstairs when I finally decide to call it a day.

It's been a rather hectic week and I've not been in the office much as Oliver has been poorly.. I'm glad to report that he seems to be feeling a little better this afternoon. I've got everything crossed that he sleeps through the night. Almost every night this week, he's had fevers and been poorly which means no work or rest for me.

I'm trying to remember which day / night I started making this. It could have been Monday. At least, I think it was. I finished it on Thursday and sent it courier to my mum in Scotland. Thankfully, it arrived yesterday intact.


I came up with this concept a year or so ago. I started off with a mini cupcake bouquet and that gave me the idea for a soap bouquet

Since then, I've seen cake pops sprouting up EVERYWHERE. I think they look absolutely super - but I really really don't like the texture.


Recently, Ann @ AnncooJournal.blogspot.com made some cute looking cake pops and it made me want to try again. I knew I'd have to do something a little different though as the texture of cake pops literally makes them unedible for me.

First of all, I had a play last week with a 16 rabbit silicone bakeware mould and also a 15 rose mould. I made some chocolate hazelnut mini friands on sticks. Mega cute they were too and VERY yummy. Oliver liked them rather too much and they didn't last long enough to cover in candy melts.


I did try dipping the ones made in the 15 rose - but wanted a smoother, sleeker finish. I really liked the soap bouquet I came up with a year ago. Until a couple of weeks ago, I'd avoided Wilton Candy Melts - thinking they would taste like the really vile fake chocolate cake covering stuff you can buy in th supermarkets. Now that's what I call vile. Uggh.

Well, I had the opportunity to taste a Wilton Candy Melt and was truly surprised. It's pretty yummy stuff - tastes just like white chocolate - and comes in a super array of colours. It's easy to work with and sets much faster than chocolate.

Rather than make solid sweets, I decided to make up a batch of vanilla fudge. Truly sweet and tastes delicious.... but just to top it off - I'd cover it in the candy melts for that shiny pink finish..


First of all, melt some of the candy melts in your chosen colour. Put about a teaspoon into a cell in the 15 rose silicone chocolate mould.  If you prefer, we also do a sunflower, flower and chrysanthemum version in the same size.

Use a paint brush and work it into the detail to prevent air bubbles. I'd normally do this but decided not to faff about bother this time. The results after unloulding were not as good and left the finished item showing bubbles. Ooops... never mind.


Next step was to pack each candy shell with homemade fudge. I'd made the fudge the night before and it was ready waiting in the fridge. Recipe is below for convenience.


You will need a large, heavy based saucepan and a WELL buttered 8" square tin - or an 8" square silicone mould (unbuttered). It's also VERY important that you prepare your ingredients in advance for this recipe so everything is to hand. When you need them - there is NO time to spare !
Ingredients

125g butter
3/4 cup of evaporated milk
2 cups of granulated sugar
12 marshmallows
200g white chocolate - chopped
2 tsp vanilla extract

Put the butter, evaporated milk, sugar and marshmallows into your saucepan. Melt together on a medium heat and bring to the boil - stirring constantly.

Set your timer - or check your watch. Keep at a boil for EXACTLY 5 minutes if you want a soft fudge leaves teeth marks as you bite in. This is how I prefer it.... However, if you prefer it crumbly, boil for 7 minutes. Don't worry about darker coloured flecks rising up. These disappear totally later. Just don't forget that you need to constantly stir as soon the ingredients are all melted

Take it off the heat and immediately add and beat in the chocolate and any dry additions. Quickly pour in to your square silicone tray mould or tin, scraping as much as you can fron the sides of the pan.
Leave to cool. I like to refrigerate overnight after cooling before cutting into squares.


I took pieces of fudge and softened in my hand, then packed it into the shells. I then inserted two cocktails sticks into each. This proved to be a pain when putting the final sealing coat of candy melts on, so I actually took them out again and then inserted straight after.


About a teaspoon of candy melts on top of each and wiggle the mould a little from side to side. The candy melts (or chocolate) will self level. Just do one or two at a time. This stuff hardens pretty quick.

They were a dawdle to remove from the moulds as you can see below.


 I made two trays of these up and made a few of them into fudge pops by putting lolly sticks in instead of cocktail sticks.


To make the bouquet, you will need a polystyrene ball. The one I used was 4" diameter. I got a pack of them off Ebay a year ago before I made the soap bouquet and they worked out under £1 each back then.

As this was to be mounted on top of a tinplate watering can (£3.00 from ASDA). I used a serated bread knife to make a flat base on the ball.

Make sure you refridgerate these fudge pop thingys until they are good and hard. If you don't, the candy coating will break off as you try to push the sweets on to the ball. I wasted a few. Take say 3 or 4 out the fridge at a time and leave the rest in there as you work.

Use a clean kitchen towel to hold the sweets whilst you push them into the ball. Contact with your hands will melt the chocolate and  they won't look good with finger prints :-P


Insert the sweets into the ball and cover it. Do about 1/3 to 1/2 the ball and put the ball back in the fridge for at least 30mins. When you turn the ball round to put the final sweets on, it's almost impossible not to put pressure on the rest. A few may break - so do have some spares. It's best to make sure the ones on the ball and cold and hard before you do this.


Once covered mine went in the fridge for a couple of days until I had to finish it in a mad rush to send to my mum. You see, I had a really silly accident and sprained my left wrist. Hell - it HURT for a good couple of days and I'll admit it was agony just trying to finish this. I couldn't have done it without the help of pain killers.

I did something really daft. Oliver was not as nursery as he was poorly. He had to come to work with me for a little while. Whilst we were there, he spotted a little scooter that I'd bought for him to take when we go up to Scotland at the end of the month. The steering is a bit weird. You put weight on the board to turn left or right. It's meant for kids a bit older, but he should manage.

 Anyway, he wanted mummy to show him how... Here's this great heffalump on a toddlers scooter. The handlebars stopped at my knees. So I was scooting in the yard when the wheel jammed on a tiny stone.... que Heffalump goes fundamental over basic right over the handlbars. SPLAT. Geez it hurt !

I think I muttered many a curse in my head before regaining composure. Oliver (bless him) asked me what needed to be kissed better :-) I'd do it every day for Oliver kisses - they're few and far between !

Anyhow....

I had the remains of a fake white rosebud bouquet in my stash. I snipped them off and inserted them in the spaces between the sweets. The polystyrene ball is much harder than oasis used for flowers, so I had to first of all make holes with a wooden skewer to be able to insert them.


That's actually all there is to it. The "ball" is just sat on top of the watering can. You could sit it on top of a nice vase if you prefer.

Makes a super sweet gift that any recipient will always remember. You could even make them for wedding table decorations that double up as favours !

That's it folks - it's 4am and I need some beauty sleep. Working these hours, no wonder I'm in need of a face lift ! I'll catch the blog up with some things I've missed very soon and next time I ride a kiddies scooter, I'll remember my crash helmet ....

Love to all,

Night Night x

Sarah-Jane Nash - http://www.siliconemoulds.com/ - the silicone bakeware cookshop

Saturday, 7 May 2011

Melting Moments With Chocolate and Hazelnut Buttercream


Well - these really did not take long to make, and they did not last long either. These cookies are buttery and melt in the mouth. Two of them sandwiched together with buttercream in the centre creates a cookie that is very like a yoyo in size and shape !

Rather than just make a normal vanilla buttercream, I vamped it up a bit and added a load of cocoa about 3 tablespoons of toasted and ground hazelnuts which worked beautifully.


They would make the perfect accompanyment to a cup of tea and a super size to pop on the top or centre tier of a cake stand. Or share as I did with a best friend over a cup of tea !

They're easy and quick to make and the recipe produces only 8 > 9 filled cookies - so not too many either. I had one with a friend the morning I made these and then too the rest into work.

Recipe - Melting Moments

170g salted butter
60g icing sugar
170g plain flour
60g corn flour (I used rice flour as had run out !)
2tsp vanilla extract

Beat butter and sugar until fluffy and then gently combine the flours.

Roll into walnut sized balls on to a baking tray prepared with baking parchment or a silicone baking sheet /tray liner. Flatten with a fork.


Bake for approx 12 mins at 160deg C fan until just starting to take on colour.


Once totally cooled, fill with your buttercream.

I had no real recipe for this. I started with a dollop of butter and some icin sugar, added some cocoa, a splash of milk and about 3 tablespoons of hazelnuts (ground and toasted).... then a bit more icing sugar to get the right consistency.

I piped the buttercream using a 1cm nozzle on to the cookies for neatness.


I've been really busy the last few weeks and am still VERY unorganised for the coming show. There is lots and lots of work to be done.

I'm honoured to have had some bloggers helping me out with some photos for my slideshow presentation to be part of our stand at the Ideal Home Exhibition at the SECC 27 > 30th May. Do come and say hello if you are there ! We'll be opposite the farmers market at the division between homewares and the food halls.

I'm dying to show you some of the photos - but need to get up to date with a load of work yet.... but they'll come soon :-)


The last few weekends have been rather packed. The week before last, we made a day trip to the seaside. I was upstairs in Oliver's room gathering some clothes and towels when suddenly it got very dark. There was a hot air ballon directly behind the back of our house and totally blocking out the light from the window.

I shouted down stairs and my husband quickly put some clothes on Oliver and they raced outside to see the balloon land. Unfortunately, from where I was, it was not possible to get a photo. Oliver is a bit wary of sitting high up on Daddy's shoulders and was gripping on just a bit too tight....


We all got to watch once Oliver relaxed a little !

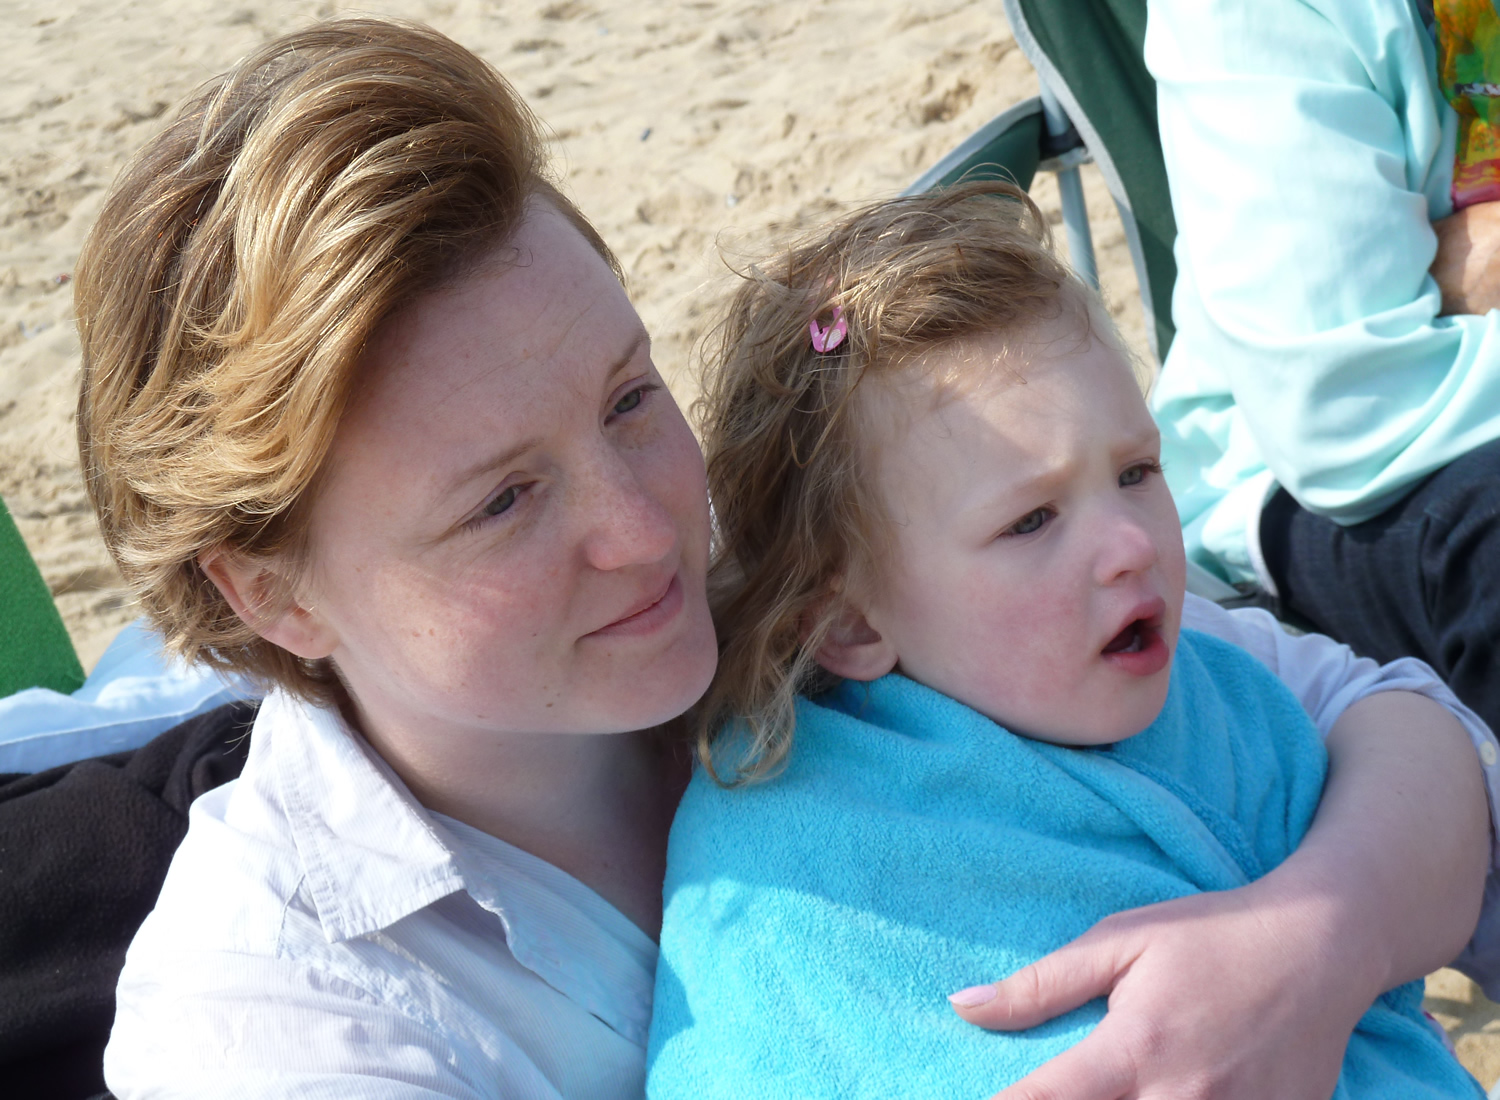
Then it was off in the car to the seaside on the North Norfolk Coast with Victoria, Emma, Maurice, V's dad and nanny.


Looks lovely - doesn't it. Gloroiously sunny day - but VERY windy and bitterly cold !


You would never guess hwo cold it was. Oliver even took a dip (albeit accidentally) in the sea ! There is a video clip of Youtube. He really wasn't expecting what happened.


Emma having a cuddle with her mummy (Victoria) in an effort to warm up.


Sun, sea, sand and WIND !


.

Two freezing children - by this time, Oliver was practically turning blue ! Still took a lot of effort to "remove" them from the sand and head home

On the way home, we spotted a tiny little bicycle for sale by the side of the road for just £5.00 - so Oliver now has his first real bike. He had to practise riding it with Daddy as soon as we got back.


Sarah-Jane Nash, http://www.siliconemoulds.com/ - silicone bakeware specialists May 11

Thursday, 28 April 2011

Royal Wedding Celebrations & Granny Guen Murray Sits it Out !


I'm dedicating this blog post to one of my employees' (Rich) granny - Guen Murray - who has been camping in front of Westminster Abbey since early hours of Tuesday morning. We've been getting hourly updates of what's going on in London.

Granny Murray has been camping out in a little tent on the pavement. It's not the first time she's done it either - Guen camped out to see Prince Charles marry Diana and when Prince Andrew married Sarah Ferguson.

I can't say I'm excited about the Royal Wedding and I won't be staying home to watch it. There will be plenty time to catch up with what has gone on via the news on television later. I've just got my car back from repair and after having been stuck at home with a bored toddler for a week... I want to go out !

Still. I hope Granny Guen will approve of my Red Velvet Whoopie Pies and Cupcakes !


The above photo is from the New York Daily News, 26/4/11. Clicking here will take you to their report and a video clip of Guen Murray camping out in front of Westminster Abbey for the best view for the Royal Wedding of Prince William and Kate Middleton as they marry tomorrow.


This blog post is about a trick I learned very recently.

When making buttercream, I like to use spreadable butter. It's almost all butter, but with a small amount of oil through it which makes it easy to spread straight from the fridge and easy to whip up into buttercream without having to wait forever for the butter to soften first.

In the picture you can see pure butter on the left and spreadable butter (80%) on the right.


However, vanilla butter cream is NEVER white. It always has a yellowness to it due to the high butter content. A lot of people seem to use vegetable shortening such as Trex or Crisco for making white buttercream - but that (in my opinion) simply makes it greasy, tasteless and gross. The other popular way of whitening it is to use Wilton Super White which is a paste. You need quite a lot, so this ends up rather expensive and remember to buy two or three bottles at a time.

Someone has taken taken the time and effort to put a really clever little video up on Youtube....

Basically, you make your normal buttercream and add the tiniest amount of VIOLET food colouring to it. What happens as you mix this in is that the violet counteracts the yellow of the buttercream and neutralises it to white !


This photo isn't great - the lighting in my kitchen is rather dire - but hopefully you can see the difference. The buttercream on the beaters has the violet added and the buttercream on the teaspoon hasn't.

Do take care only to add the violet food colouring a tiny speck at a time. If you add too much, it will turn a yucky grey. This can be "brought back" however if you add some extra butter and icing sugar and basically increase the batch volume.

The white buttercream makes a big difference when paired with something that creates a big impact like these Red Velvet Whoopie Pies and Cupcakes


Recipe for Red Velvet Whoopie Pies
(adapted from Baking Recipe Collection by Sainsburys)

75g salted butter
125g light brown soft sugar
1 egg
1 teaspoon vanilla extract
180g self raising flour
50ml milk
1 tablespoon red food colouring

Cream the butter and sugar until light and fluffy. Beat in the egg and vanilla. Mix in the flour, followed by the milk and food colouring. Watch your mix turn into a great big bowl of what looks like clotted blood. GROSS.

Put the batter into a piping bag fitted with a plain 1cm nozzle, and pipe small circles about 2cm wide on to baking parchment or a reusable silicone baking tray liner mat. The first one I piped on to was bright red. The cerise colour of my raw mix clashed rather violently and looked rather odd !


Leave a decent spacing between them as these will spread.

Put into an oven at 160deg C Fan for about 10 minutes. Leave to cool for around 10 minutes before transfering to wire racks. This recipe made approx 24 small whoopie pies.


Once cooled, pair them up with same sized counterparts and then fill with your buttercream.

The buttercream is simply made up of 4 cups of icing sugar, 115g salted butter and 1/4 cup of milk.


I decided to top some of my whoopie pies and cupcakes with some little chocolate roses. The little roses are made from a new silicone chocolate mould which will be available in about 2 to 3 weeks time. You will be able to find new mould designs here as soon as they are available.

I only made a handful of these up as I had so little chocolate left. Stupidly, I forgot to give the mould a little shoogle from side to side to knock out the air bubbles.. Duh

But don't they look cute ? They make smart little chocolates or cupcake toppers ! Brown paper cupcake cases always look classy - even if my tray us a bit gaudy...


The cupcakes are a basic vanilla cupcake recipe. You can find it here. The only change was substituting 3/4 of a bottle of cochineal food colouring for some of the milk.

Incase no one has guessed, I was really chuffed with how these photos came out. I think they are probably my best yet. Problem was choosing which ones to post !

Have a lovely holiday weekend everyone.

Love from all of us x

Sarah-Jane Nash, http://www.siliconemoulds.com/ - reporting on the Royal Wedding of Prince Willian and Kate Middleton, April 29th 2011 

Saturday, 23 April 2011

Sweet Potato Fries and Homemade Mayonnaise


When only "CHIPS" will do.

Potato chips in the UK are not the same as potato chips in the USA. CHIPS in the UK are potato fries in the USA and CRISPS in the UK are what they call CHIPS in USA.

Now I've confused you, I can tell you that these are probably one of the most simple things you will ever make and calling them fries or even chips isn't really right as they are not even fried - they're baked !

You may or may not remember the 80's tv advert for McCains Fries. It's about two little girls and one asks the other - "What do you prefer - Daddy or chips ?". It's a rather iconic advert and I still remember being in the car with my brother and the two of us saying "Daddy or chips ? C-h-i-p-s !"


Well - McCains Homefries are probably the best UK freezer cabinet chips you can buy in the UK, but they still don't beat home made. Home made baked and not fried have to be better health wise too !


The sweet potato fries are nothing more than sweet potatoes cut into 12mm (approx) rings and then cut length ways into 12mm  finger like lengths. Toss in olive oil and sprinkle with cleery salt. Place on a baking tray on the top rack of your halogen oven and turn temperature to approx 230deg C. Cook until edges are turning crispy and brown - approx 12 minutes. Alternatively, preheat a regular oven to a similar temperature and shove them in there for around 30minutes.

HOMEMADE MAYONNAISE

This has to be the best with chips. Homemade mayonnaise is quite a vivid yellow colour. If you have got good free range eggs as we do, it will be very vivid indeed. As much as I like homemade mayonnaise, I find it far too strong tasting for memade with olive oil. I far prefer using rape oil or sunflower oil. Groundnut oil works well too. If it's too thick and cloying, add a teaspoon of water at a time right at the end and beat it in. This will significantly lighten the colour and lighten the taste. I usually have to add a touch of water. Lemon works well too - but keep tasting or it can get very lemony !

Ingredients

290ml sunflower oil
2 egg yolks
1 tsp salt
1 tsp colman's english mustard (bit more if powder form)
squeeze of lemon or couple of tsp vinegar

Beat the eggs , salt and mustard together. Add a drop or two of oil and beat it in. Keep adding the oil just a few drops at a time. It is easiest to do this with a hand mixer. After a couple of minutes, add the oil in a very slow and steady stream. As it starts to get cloying and lumpy, add in the vinegar or lemon to let it relax and then continue adding the rest of the oil.

Taste. It's probably going to be a bit cloying again by now. If not too acidic, add a tiny bit more vinegar or lemon. If it's slightly too acidic or you think it's right but just too thick, combine in a teaspoon or so of cold water at a time which will lighten it up and relax it.

Cover mayonnaise not being used immediately in the fridge with cling film over the top. I like the film to touch the mayo to prevent a skin forming.

Sarah-Jane Nash - http://www.siliconemoulds.com/ - halogen ovens and halogen cooker recipes

Friday, 22 April 2011

Honeycomb Soap - post dedicated to Umeko


Umeko regularly emails me with photos of many things she has been making with our silicone moulds. It's lovely - I like to be able to see what others have been making. Umeko lives in France and makes a lot of soap with melt and pour soap base and more recently also making her own cold process soap.

Melt and pour soap is very simple to use. You literally just melt and pour - adding your choice of colour and fragrance oils. There is a massive range of cosmetic grade fragrance oils available cheaply and in small volumes on Ebay. Melt and pour soap sets in around 30 minutes and is ready to use immediately. We keep a large range of very easy to use silicone soap moulds. Those plastic ones are really difficult to get the soap out of !

Cold process soap is a lot more involved - heating oils and lye and adding caustic soda, then beating until it reaches a trace (kind of like beating double cream) before pouring into moulds. Cold process soap needs left for around a month to cure and then must be tested with litmus paper before it is safe to use.

I do fancy having a go with cold process soap making at some point - but given I've got a toddler who likes to help with EVERYTHING, I don't really want to start skiddling around at the moment with cold process. Still - I've done a lot of work and fiddling around crafting and baking today and yesterday as my car is broken again. Boo hoo.

We've got this new design soap mould coming in a few weeks time. It's a double cell mould to create large bath soaps - one oval and the other rectangular. You will be able to find via this link HERE as soon as it becomes available.


Anyway, I digress. Umeko has just come up with the idea of making a honeycomb type soap and it's a genuis idea if I may say so. I liked it that much, I thought I'd have a go myself !

Basically, to get the honeycomb effect, Umeko simply lined her biggest soap mould with bubble wrap and then poured in the soap base. It came out with outstanding results - have a look at her photo below.


The size of the bar in Umeko's hand is roughly the size of the rectangular bar in our TWO BAR soap mould. Only problem with using a big rectangular wooden box mould to make this in is that you end up with loads of bars all in one go. Great if you are selling it - not so good if it is only for your own use !

Anyway, I melted some SLS Free opaque melt and pour soap base  (about 150g) and added some honey, milk and oatmeal fragrance along with a couple of big heaped teaspoons of locally produced runny honey and a little colouring.

 The darker the honey, the stonger the flavour. The honey I have at the moment is very light. It smelt good enough to eat - but unsurprisingly tasted a bit soapy (I KNOW - I just couldn't resist !!!)


For the first bar, I laid some bubble wrap on the bottom and then poured in the soap base, laying more bubble wrap on top. When it was set, I pulled the bubble wrap off.


As you can see, I could have done with adding a little more colouring and secondly using a NEW piece of bubble wrap rather than stealing a bit from the length Oliver currently has in his toybox for popping. What is is that makes popping bubble wrap so addictive ?


After that, I melted down some transparent melt and pour soap base and added a tiny bit of yellow colouring and some more honey. This was to pour over the top of the opaque base layer. Mine maybe is not so effective as Umeko's - but the transparent layer is sealing in the bubblewrap / honeycomb effect which will make it last longer and not wear the effect away so quickly. The colour shown above is what I used on my finished photo of the soap. The first attempt was a bit too orange.

I poured this over the top of the base layer after removing the bubble wrap. Once the soap was set, I released it from the mould and turned it over to repeat with the other side.

 The base layer took several times longer than normal to set - I actually ended up popping it in the fridge. I can only think that this was due to the bubble wrap causing and isulate layer. Amazing stuff bubble wrap. I've used it a few times in the past to wrap up hypothermic foals. It's literally a lifesaver.


The first attempt - just a bit too orangey on top. Looks ok in the photo - but it's really bright in real life and hides the honeycomb effect too much.

This soap is really yummy addictive. It's also very very slippy ! Ok - soap IS slippy - but I think this is really slippy and can only put it down to the honey. I adore it, it's beautiful to wash with. We've got one as a super big bath soap and I cut the other in half so Oliver can use it too. He loves the soap with "the bubbles in it" - but I've lost count how many times he's dropped it. It's that slippy he can't hang on to it washing his hands and drops his little bar 10x more often than a regular bar !


This is the second (lighter) coloured bar. I think the base layer needs to be a bit stronger coloured though, so I've got another hardening at the moment. This time I've added a little soy sauce to it too which is giving it a really nice caramel colour. I can't wait for it to finish hardening so I can pop it out !

Sarah-Jane Nash - http://www.siliconemoulds.com/ - silicone mould specialists - supplying worldwide

Dozen Egg and Ham Pie


If your chickens have gone into overdrive as mine have with the onset of Spring - this is the ideal pie to make ! Normally my husband (Steve) takes surplus eggs to his work with him and these are very quicky snapped up by his customers. However, he has forgotten the last couple of days and it is also a bank holiday weekend...

The chickens are laying us about 7 > 8 eggs per day. I've still got about two dozen sitting in the kitchen and that's before I collect todays ! This takes about an hour to make and an hour to cook - so set aside plenty of time. You could easily knock 20 minutes of prep off if you buy shop bought pastry.


I saw a recipe for a bacon and egg pie in last months Delicious Magazine and decided to change it about a bit. Btw, the clue is in the name - so don't go making this if you haven't got masses of eggs ! Ideal for picnics or a cold supper / lunch with a simply dressed salad. Serves around 10.

You need an 8" spring form tin for this pie

For the pastry :

350g plain flour
180g salted butter (cold and cubed)
little extra salt.

Either use a food processer to blitz the above to crumbs, or rub the fat into the flour with your fingertips until crumbs form. Add just enough cold water to be able to bring it to a dough. Alternatively, cheat and use a 500g of store bought - but it WON'T be the same !

Put 200g of the pastry aside and roll the rest out large enough to line an 8" tin with a little overhang.

If you have a silicone pastry / fondant rolling mat, rub in a tiny bit of Trex / vegetable shortening or similar if it is the first use aand simply roll. If you are just rolling on a normal worktop, you will need some extra flour. Here is a really rubbish video I did a week or so ago showing rolling sweet pastry which is far more fragile and delicate


PIE FILLING

12 eggs - the fresher the better !
400 > 500g of bacon or gammon offcuts, thinly sliced
2 bunches of spring onions, chopped
2 tablespoons freshly chopped chives
2 tablespoons freshly chopped oregano
200ml double cream
1 teaspoon chilli powder (can be ommitted)

I used 460g of gammon offcuts from Tony Perkins - our local butcher. All his pork / gammon comes from the prizewinning Metfield herd. Gammon offcuts are amazing good value - the pack I had was 96p ! (about $1.55)

Slice these thinly and then fry until the edges are starting to turn golden and crispy. There was so little fat, I had to add a touch of olive oil to stop them sticking to my non-stick pan.


Once these are done, set aside and fry off the spring onions for about a minute along with the herbs.


Mix the spring onions and fried bacon / gammon pieces together. Put 2/3 of these into the pastry case.


Mix 200ml of double cream with two eggs and the white of one plus the chilli powder if using. There is hardly any chilli in this, it's for background heat only really without the grittiness of ground black pepper. Alternatively, you could use finely ground white pepper.... Put the remaining yolk aside. Pour about half of this over the bacon / gammon and spring onion mix.


Break NINE eggs on top of the bottom layer and then pour the remaining cream / egg mix on top.


Roll out pastry reserved for the top. Brush a little water round the pastry at the top of the case and lay the lid inside, pressing the two pieces together to seal. Trim round the top with a sharp knife.

Roll the top seam down and use a fork / spoon handle or similar to pinch it in .


Use the remaining egg yolk beaten with about 1tsp of water to glaze the pie.

Cook in a fan oven at about 170deg for 70mins. Remove and allow to cool before serving.

Sarah-Jane Nash - http://www.siliconemoulds.com/ - silicone bakeware mould specialists - April 11