Yup - it's AUGUST and I'm making Christmas cakes !
Seems crazy doesn't it - but the effort is worthwhile. I took an old, vintage cake recipe and gave it a bit of a vamp. I'm happy to say, these have turned out absolutely divine and will only get better on maturing....
I've run out of homemade apple brandy liqueur this year and am about to make more. However, I did have a couple of bottles of Mulled Wine left from last Christmas and a bottle of Triple Sec Curaco (bought from MandS) - orange brandy and cognac... so these recipes were based on what I had lying around.
Now, I can't wait until Christmas !
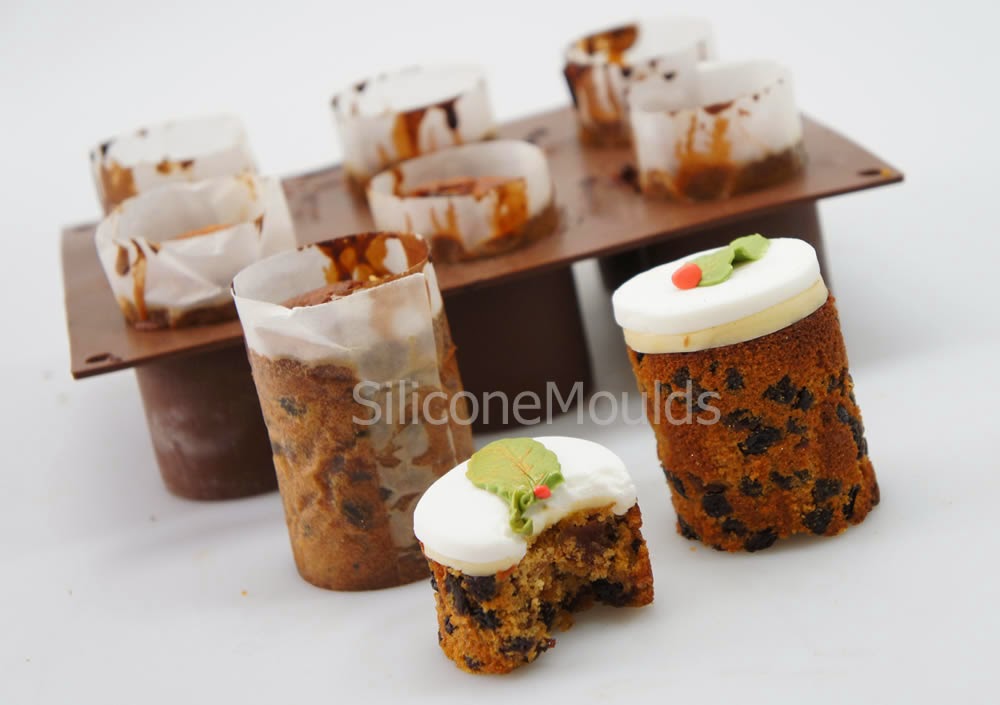
Actually - I've just made a load of single portion ones in 2" dia, 6 cell cylinder silicone mould . These are awesome as they are perfect for single portions .... or cut into two to turn each into teeny tiny mini cakes..... Nope - not sharing .... those are ALL mine :-)
For 3" diameter (two to three person serving - or just a nice gift size) - use our 6 cell Paw Print mould. It's got super straight sides and you won't see the paw prints on the base when you follow the easy tips at the bottom.
The method for both cake recipes is practically the same. For the deluxe chocolate version, mix the extra ingredients (melted butter and chocolate) into the batter before adding fruit.
Ingredients : Traditional Style Fruit Cake (but with Mulled Wine)
255g of butter
255g of brown sugar (or 220g white sugar and 35g of black molasses)
50g of golden syrup
5 eggs
255g of self raising flour
2 tsp of mixed spice
675g of currants
175g of sultanas
100g of candied peel (or swap out for dried cranberries)
125g of chopped glace cherries
100g of chopped walnuts (also great when swapped out for glace ginger
125g of chopped apricots
1.1/2 cups of mulled wine or 1 cup of brandy, plus 1/2 a cup of water
2 clementines (whole) with thin peel - pulsed in food processor until smooth
Makes 1 x 10" or 2 x rather deep 6" cakes. If making the Extra Deluxe Chocolate Orange Christmas cake, the 6" tins will make very deep cakes. You might even get away with using 3 tins.
Bake at 150deg C for approx 160mins (10") and 130mins (6" - as it's really deep)
Line cake tins with a double layer of parchment, which should rise at least 3" / 75mm above your tins. For the little silicone moulds, see preparation instructions and pictures at the bottom of this blog entry.
Alternatively, try using 2" diameter and 3" diameter silicone bakeware moulds (pattern at the bottom is irrelevant when lined with paper !) . See further down for links, photos and tips !
30mins baking time for 2" and 45mins for 3".
30mins baking time for 2" and 45mins for 3".
Put dried fruits in a saucepan with lid on with the alcohol and bring to a simmer 5 mins. Allow to sit and cool with the lid on for at least 20mins and absorb all the liquid.
Cream butter and sugar, syrup and treacle (if using in place of brown sugar)
Add eggs one by one, followed by a table spoon of the flour after adding each egg.
Add rest of flour / mixed spice, followed by two whole (thin skinned clementines) - blitzed to a puree - can be omitted.
Finally, mix in the plum fruits / nuts and any remaining liquid. I tend to dump the batter on top of the fruits in the pot, and then mix it in.... Quick, and dead easy !
**** For an Extra Deluxe Chocolate Orange Fruitcake ****
add 75g extra melted butter plus 200g melted dark chocolate and 50g of cocoa powder to the batter.
When warm from the oven, put 1tsp of brandy / Curaco over 2" cakes, 2tsp over 3" cakes and about 2 tablespoons over 6" cakes, 3 over 8" and 4 over 10"
If you wish, you can further improve your cake by maturing and "Feeding" your cake with a little alcohol every week brushed over the surface , wrapping up the cake between feeds.
Brandy is the alcohol of choice for most Christmas cakes - but I'm using Dry Curaco from MandS at the moment for a lovely orange kick. Works so well with the fruit and also with the chocolate !
Here's how I cheat with lining the 6 cylinder 2" and 3" diameter silicone bakeware moulds
First of all, grease your moulds using a little butter on a piece of kitchen paper
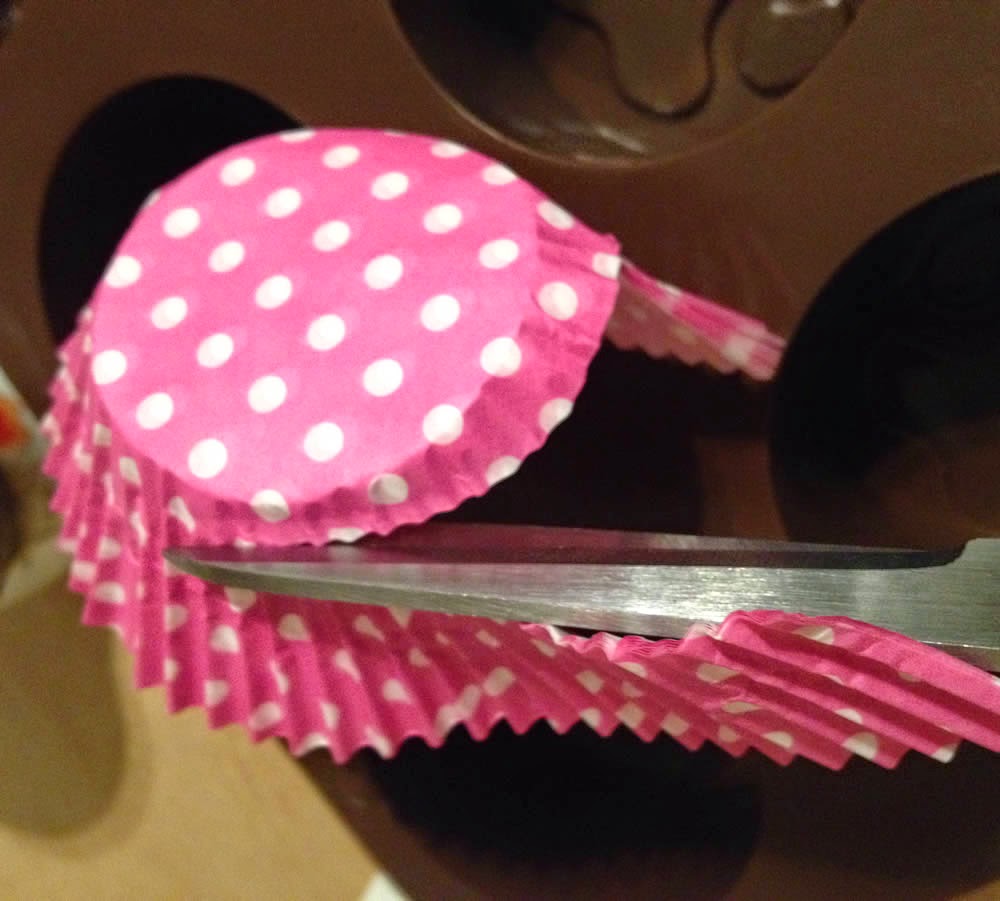
Then, take some standard size cupcake cases and cut off the sides - which will leave you with the 48 > 50mm centre at the bottom.
This is now REALLY easy to pop into the base of your mould.
I like to line the cells of moulds for Christmas cakes. If you are leaving the cakes in the mould to feed them, they end up quite damp and lining makes it super easy to remove them with just a little tug.
For the bigger 3" dia moulds, use the same method - but cut a little higher round the base part of the paper ... leaving about 1cm extra right round.
You can actually see the paw print on the bottom of the cell of this mould - but that doesn't matter as you wont notice it in a minute.
Ta da ! Quickest ever mini parchment circles :-)
Now, cut some strips of baking paper / parchment to about 4 " / 100mm high.
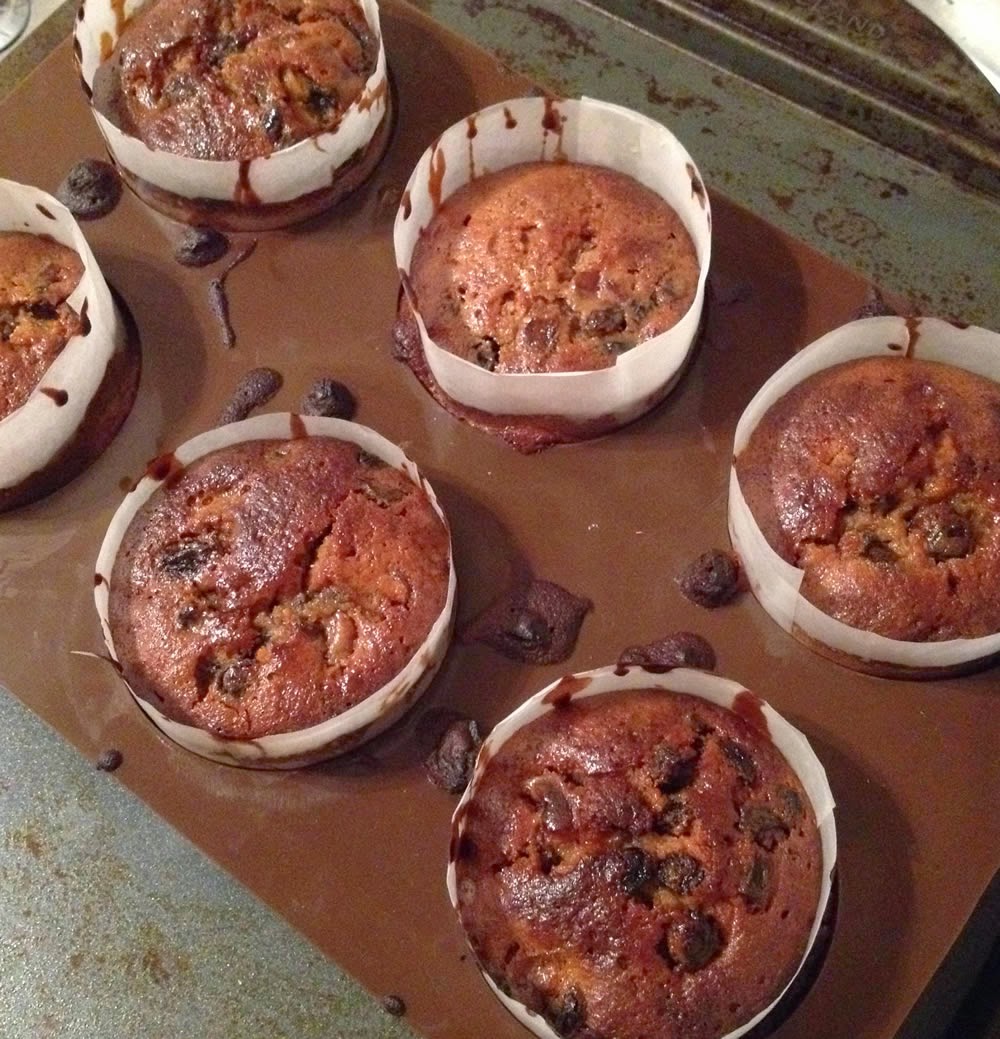
Simply roll into a loose tube and pop into the cell.
Easy as it possibly can be !
Fill the cells of your 2" and 3" moulds to level with the top of the cell. The cakes will rise a tiny bit - but by the time they are trimmed, the height will be a full 2" before icing.
For mine, I decorated the small ones very simply. I brushed some warm apricot jam on the tops used a cookie cutter to cut out small circles of fondant and marzipan.
The larger cake shown further up is actually the Extra Deluxe Chocolate and Orange version. Not overly happy with the decoration - but it was first attempt at upside down sharp edges in fondant and I'm fairly happy with the results.
This one has a full covering of modelling chocolate (Modelling Chocolate pdf Tutorial), then a layer of fondant on top. The chain border round the bottom was made from this cake decorating sugarpaste push mould
Happy Baking !
Do let me know how you all get on with this recipe :-)
Do let me know how you all get on with this recipe :-)
Sarah-Jane Nash - http://www.siliconemoulds.com - website
http://www.facebook.com/siliconemoulds - facebook page
http://www.facebook.com/siliconemoulds - facebook page


