Showing posts with label novelty cake. Show all posts

Wednesday, 4 June 2014

Tiffany Lamp CAKE - Yes .... This REALLY is a Novelty Cake that looks like a table lamp !

structural and brightly coloured novelty tiffany lamp / table lamp cake

I'm so in love with this cake. The idea of making a cake looking like a Tiffany lamp has been in my head for almost a year.... it's taken me forever to get round to making it as inevitably something always seemed to get in the way that needed my time more. 

Certainly it's lighting me up on an otherwise dull day !


Isn't it pretty ? When finished - it really looked like a proper Tiffany table lamp !

Well - last week I tried out a new madeira cake recipe I found on the net from www.cakesbakesandcoolies.com that allows you to size up a madeira cake from 6" to 12" diameter.

I've copied and pasted their chart onto this page below so I can save it in my own personal ebook, for my own use. Should you wish to use their recipe, you may like to trot along and visit their page and print out the full recipe and instructions.
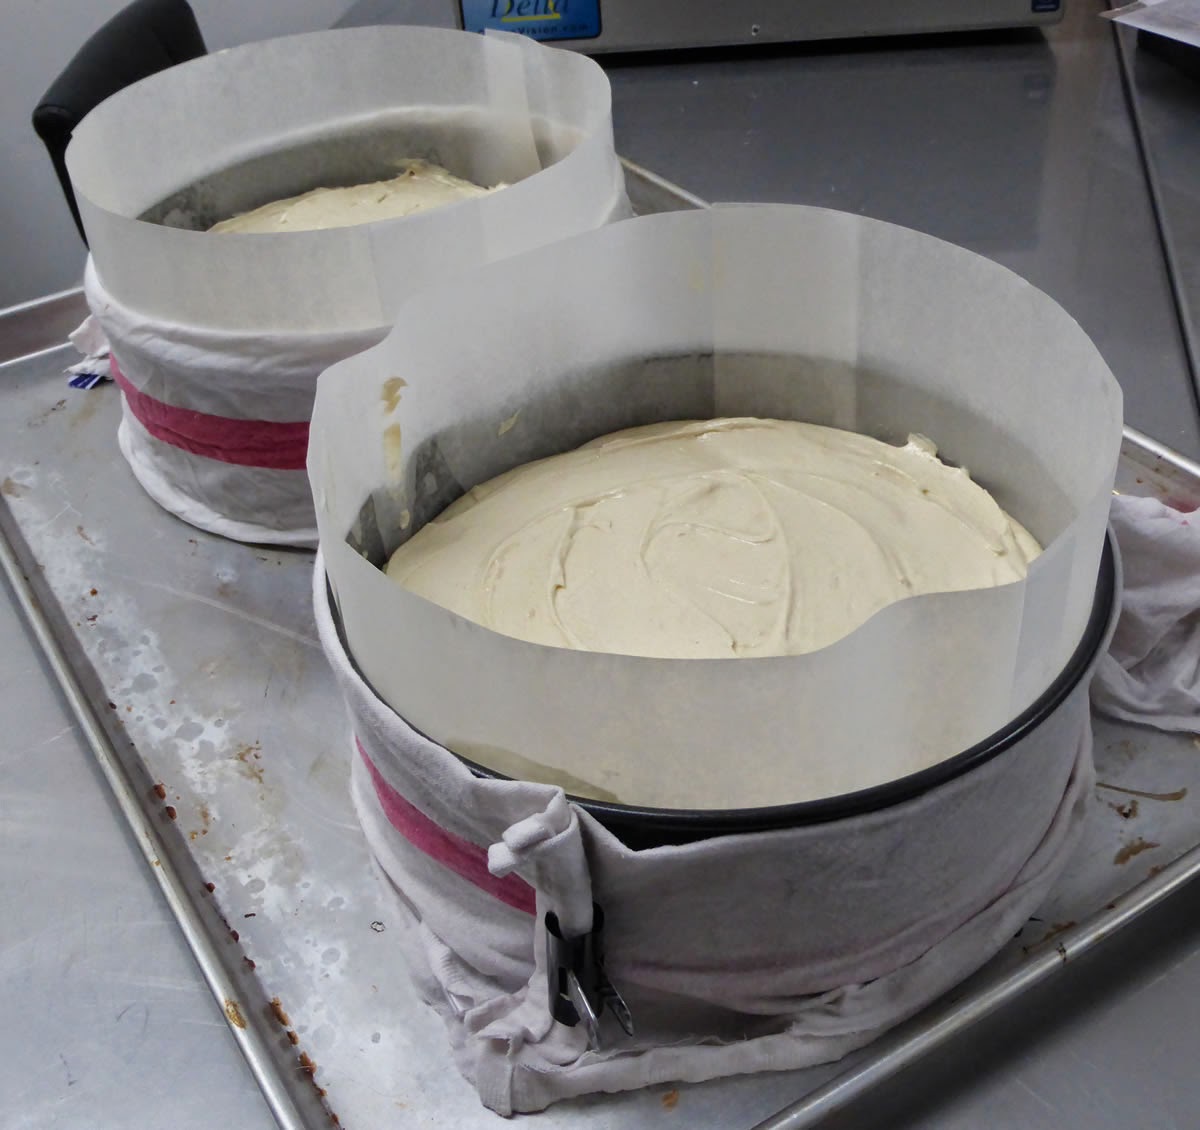
I baked two x 10" dia madeira cakes. Here you can see I wrapped some strips of damp kitchen tea towel around the outside of the tins and secured with bulldog clips. This helps stop the sides browning too much / getting crusty.


My cakes had a little bit of a dome and a small amount of cracking. I baked at 170deg C - next time, I'll bake lower and for longer...


Cake was very easy to split and had a good even crumb. I usually bake only with butter, but this recipe suggested using 50% stork / 50% butter. I must say, I was skeptical - but the results were very good as was the flavour. 


After trimming, these cakes measured 75mm / 3" high. I cut each cake into 3 layers and filled with buttercream and jam between each one. I them carved the stack into a dome shape before covering in fondant. It's a pretty big cake and on a 16"square board.


Yes - it really IS a cake as you can see in these staged shots. The board is covered in fondant and made to look like wood. The body of the lamp is modelling chocolate around moulded Rice Krispy treats.

I marked on my patterns with a modelling tool before hand painting the "glass" in. Easier said than done ! The leading is modelling chocolate, hand painted with lustre dusts.

MODELLING CHOCOLATE RECIPE

1 bag of Wilton WHITE candy melts (melted)
118g corn syrup - warmed
gel paste colouring (if required)

For black modelling chocolate, add a tablespoon or two of cocoa powder - plus black colouring to the corn syrup. For other colours - omit cocoa

Mix the two together until combined. Transfer into a plastic food bag and allow to sit for a couple of hours to harden up a bit. Knead thoroughly and re-bag. This will be ready for use tomorrow :-)

CLASSES

If anyone is interested in learning how to make this cake, it can be taught as a two day class. A maximum of 6 places would be available. Cost of £225 for the two days, to include cakes and all materials.

Sarah-Jane Nash - www.siliconemoulds.com - June 2014

Monday, 19 May 2014

Land Rover Defender Novelty Cake - Caking With Amy.....


Amy is a keen 15 yo baker, who until recently, has only been playing around with cupcakes. Last month - she came and spent an afternoon with me and made a large fondant covered cake for the first time.

Amy's cherry blossom cake is below. Pretty and a really nice job, especially for a beginner !


Couple of weeks later, Amy asked me if she could come for a day so I could help her make a  Land Rover Defender car cake. Well - to be honest, I'd never attempted a car cake..... so this really was a bit of a challenge...

The cake itself is a dense, chocolate brownie cake (8 x 12" lined tin), cut into layers and filled with chocolate ganache. Very, very rich - but a nice cake to work with and only small servings needed.

330g salted butter
330g dark chocolate
9 tsp instant coffee
250ml water
80g cocoa powder
380g self raising flour
1tsp bicarbonate of soda
720g caster sugar
6 large eggs
50ml vegetable oil
180g buttermilk / greek yogurt

Put the butter, chocolate, coffee and water in a pan and melt together to create a sauce. Set aside to cool.

Put eggs, oil and buttermilk in another bowl and combine. Add these to the cooled sauce.

Sieve all dry ingredients and mix together, then add wet mix and combine until no lumps are visible.

Bake in a preheated oven for 150deg C for 2 hours. 

Once cool, wrap and refrigerate for a few hours or overnight before splitting / carving.


I took a few photos along the way that may be helpful to Amy if she wants to make this cake again (or anyone else who fancies attempting a car cake)

First of all - google BLUE PRINTS and print / make a rough scale drawing of the car required.....

Here, there is a piece of foam core board, cut to shape and scale for the base. The foam core is wrapped in Baco Wrap and this board is on top of the cake drum to make it easier to move and work with.

My 8 x 12" cake was cut into 3 equal rectangles (8 x 4") and stacked. I'd already started shaping it before I thought of taking a photo. Sorry !

The bits cut of the front were kept and used later on as you'll see shortly. The cake was a little smaller than the finished size, as it still had to be coated / sealed in ganache on the outside.


Here is my rough drawing against the cake which is what I used when carving. From the picture below, I then took a slice off to get the angle for the windscreen. I did forget to angle to the roof though, and had to do that once the car was on the board.... before icing the roof. Pay to stand BACK and look !


Here you can see the front has been angled for the windscreen.


All ganched and wheel spacings cut out. Looks a bit like Postman Pat's van at this point....


Cake sat on board to get an idea of positioning. The cake scraps were roughly put in place to sit the front end of the car up - as if it is driving out of a muddy bog.


Cake off cuts ganached and on board - with a wedge to mount / raise up car.


Cake board front covered in fondant. I painted piping gel over this and covered with desiccated coconut which I'd coloured green and dried in the oven. 


The back part of the board got covered a little later in brown coloured fondant.


Side panel made out of modelling chocolate applied. There is a little strip of modelling chocolate under this along the centre line of the car to be able to dress the outer panel over and add shape.

The excess fondant for the windows was removed a little later.


A few more panels added, it's taking shape !

At this point, I then put the cake on the board and secured using a little piping gel to the fondant on the base. The front of the car roof underwent a little carving work to reshape as I noticed the error mentioned earlier.... then lights etc were added.

Hope this proves useful ! 

I certainly learnt a lot from it and know areas / ways to improve on for next time.

Sarah-Jane Nash, www.siliconemoulds.com - May 2014