Thursday 28 April 2011

Royal Wedding Celebrations & Granny Guen Murray Sits it Out !


I'm dedicating this blog post to one of my employees' (Rich) granny - Guen Murray - who has been camping in front of Westminster Abbey since early hours of Tuesday morning. We've been getting hourly updates of what's going on in London.

Granny Murray has been camping out in a little tent on the pavement. It's not the first time she's done it either - Guen camped out to see Prince Charles marry Diana and when Prince Andrew married Sarah Ferguson.

I can't say I'm excited about the Royal Wedding and I won't be staying home to watch it. There will be plenty time to catch up with what has gone on via the news on television later. I've just got my car back from repair and after having been stuck at home with a bored toddler for a week... I want to go out !

Still. I hope Granny Guen will approve of my Red Velvet Whoopie Pies and Cupcakes !


The above photo is from the New York Daily News, 26/4/11. Clicking here will take you to their report and a video clip of Guen Murray camping out in front of Westminster Abbey for the best view for the Royal Wedding of Prince William and Kate Middleton as they marry tomorrow.


This blog post is about a trick I learned very recently.

When making buttercream, I like to use spreadable butter. It's almost all butter, but with a small amount of oil through it which makes it easy to spread straight from the fridge and easy to whip up into buttercream without having to wait forever for the butter to soften first.

In the picture you can see pure butter on the left and spreadable butter (80%) on the right.


However, vanilla butter cream is NEVER white. It always has a yellowness to it due to the high butter content. A lot of people seem to use vegetable shortening such as Trex or Crisco for making white buttercream - but that (in my opinion) simply makes it greasy, tasteless and gross. The other popular way of whitening it is to use Wilton Super White which is a paste. You need quite a lot, so this ends up rather expensive and remember to buy two or three bottles at a time.

Someone has taken taken the time and effort to put a really clever little video up on Youtube....

Basically, you make your normal buttercream and add the tiniest amount of VIOLET food colouring to it. What happens as you mix this in is that the violet counteracts the yellow of the buttercream and neutralises it to white !


This photo isn't great - the lighting in my kitchen is rather dire - but hopefully you can see the difference. The buttercream on the beaters has the violet added and the buttercream on the teaspoon hasn't.

Do take care only to add the violet food colouring a tiny speck at a time. If you add too much, it will turn a yucky grey. This can be "brought back" however if you add some extra butter and icing sugar and basically increase the batch volume.

The white buttercream makes a big difference when paired with something that creates a big impact like these Red Velvet Whoopie Pies and Cupcakes


Recipe for Red Velvet Whoopie Pies
(adapted from Baking Recipe Collection by Sainsburys)

75g salted butter
125g light brown soft sugar
1 egg
1 teaspoon vanilla extract
180g self raising flour
50ml milk
1 tablespoon red food colouring

Cream the butter and sugar until light and fluffy. Beat in the egg and vanilla. Mix in the flour, followed by the milk and food colouring. Watch your mix turn into a great big bowl of what looks like clotted blood. GROSS.

Put the batter into a piping bag fitted with a plain 1cm nozzle, and pipe small circles about 2cm wide on to baking parchment or a reusable silicone baking tray liner mat. The first one I piped on to was bright red. The cerise colour of my raw mix clashed rather violently and looked rather odd !


Leave a decent spacing between them as these will spread.

Put into an oven at 160deg C Fan for about 10 minutes. Leave to cool for around 10 minutes before transfering to wire racks. This recipe made approx 24 small whoopie pies.


Once cooled, pair them up with same sized counterparts and then fill with your buttercream.

The buttercream is simply made up of 4 cups of icing sugar, 115g salted butter and 1/4 cup of milk.


I decided to top some of my whoopie pies and cupcakes with some little chocolate roses. The little roses are made from a new silicone chocolate mould which will be available in about 2 to 3 weeks time. You will be able to find new mould designs here as soon as they are available.

I only made a handful of these up as I had so little chocolate left. Stupidly, I forgot to give the mould a little shoogle from side to side to knock out the air bubbles.. Duh

But don't they look cute ? They make smart little chocolates or cupcake toppers ! Brown paper cupcake cases always look classy - even if my tray us a bit gaudy...


The cupcakes are a basic vanilla cupcake recipe. You can find it here. The only change was substituting 3/4 of a bottle of cochineal food colouring for some of the milk.

Incase no one has guessed, I was really chuffed with how these photos came out. I think they are probably my best yet. Problem was choosing which ones to post !

Have a lovely holiday weekend everyone.

Love from all of us x

Sarah-Jane Nash, http://www.siliconemoulds.com/ - reporting on the Royal Wedding of Prince Willian and Kate Middleton, April 29th 2011 

Saturday 23 April 2011

Sweet Potato Fries and Homemade Mayonnaise


When only "CHIPS" will do.

Potato chips in the UK are not the same as potato chips in the USA. CHIPS in the UK are potato fries in the USA and CRISPS in the UK are what they call CHIPS in USA.

Now I've confused you, I can tell you that these are probably one of the most simple things you will ever make and calling them fries or even chips isn't really right as they are not even fried - they're baked !

You may or may not remember the 80's tv advert for McCains Fries. It's about two little girls and one asks the other - "What do you prefer - Daddy or chips ?". It's a rather iconic advert and I still remember being in the car with my brother and the two of us saying "Daddy or chips ? C-h-i-p-s !"


Well - McCains Homefries are probably the best UK freezer cabinet chips you can buy in the UK, but they still don't beat home made. Home made baked and not fried have to be better health wise too !


The sweet potato fries are nothing more than sweet potatoes cut into 12mm (approx) rings and then cut length ways into 12mm  finger like lengths. Toss in olive oil and sprinkle with cleery salt. Place on a baking tray on the top rack of your halogen oven and turn temperature to approx 230deg C. Cook until edges are turning crispy and brown - approx 12 minutes. Alternatively, preheat a regular oven to a similar temperature and shove them in there for around 30minutes.

HOMEMADE MAYONNAISE

This has to be the best with chips. Homemade mayonnaise is quite a vivid yellow colour. If you have got good free range eggs as we do, it will be very vivid indeed. As much as I like homemade mayonnaise, I find it far too strong tasting for memade with olive oil. I far prefer using rape oil or sunflower oil. Groundnut oil works well too. If it's too thick and cloying, add a teaspoon of water at a time right at the end and beat it in. This will significantly lighten the colour and lighten the taste. I usually have to add a touch of water. Lemon works well too - but keep tasting or it can get very lemony !

Ingredients

290ml sunflower oil
2 egg yolks
1 tsp salt
1 tsp colman's english mustard (bit more if powder form)
squeeze of lemon or couple of tsp vinegar

Beat the eggs , salt and mustard together. Add a drop or two of oil and beat it in. Keep adding the oil just a few drops at a time. It is easiest to do this with a hand mixer. After a couple of minutes, add the oil in a very slow and steady stream. As it starts to get cloying and lumpy, add in the vinegar or lemon to let it relax and then continue adding the rest of the oil.

Taste. It's probably going to be a bit cloying again by now. If not too acidic, add a tiny bit more vinegar or lemon. If it's slightly too acidic or you think it's right but just too thick, combine in a teaspoon or so of cold water at a time which will lighten it up and relax it.

Cover mayonnaise not being used immediately in the fridge with cling film over the top. I like the film to touch the mayo to prevent a skin forming.

Sarah-Jane Nash - http://www.siliconemoulds.com/ - halogen ovens and halogen cooker recipes

Friday 22 April 2011

Honeycomb Soap - post dedicated to Umeko


Umeko regularly emails me with photos of many things she has been making with our silicone moulds. It's lovely - I like to be able to see what others have been making. Umeko lives in France and makes a lot of soap with melt and pour soap base and more recently also making her own cold process soap.

Melt and pour soap is very simple to use. You literally just melt and pour - adding your choice of colour and fragrance oils. There is a massive range of cosmetic grade fragrance oils available cheaply and in small volumes on Ebay. Melt and pour soap sets in around 30 minutes and is ready to use immediately. We keep a large range of very easy to use silicone soap moulds. Those plastic ones are really difficult to get the soap out of !

Cold process soap is a lot more involved - heating oils and lye and adding caustic soda, then beating until it reaches a trace (kind of like beating double cream) before pouring into moulds. Cold process soap needs left for around a month to cure and then must be tested with litmus paper before it is safe to use.

I do fancy having a go with cold process soap making at some point - but given I've got a toddler who likes to help with EVERYTHING, I don't really want to start skiddling around at the moment with cold process. Still - I've done a lot of work and fiddling around crafting and baking today and yesterday as my car is broken again. Boo hoo.

We've got this new design soap mould coming in a few weeks time. It's a double cell mould to create large bath soaps - one oval and the other rectangular. You will be able to find via this link HERE as soon as it becomes available.


Anyway, I digress. Umeko has just come up with the idea of making a honeycomb type soap and it's a genuis idea if I may say so. I liked it that much, I thought I'd have a go myself !

Basically, to get the honeycomb effect, Umeko simply lined her biggest soap mould with bubble wrap and then poured in the soap base. It came out with outstanding results - have a look at her photo below.


The size of the bar in Umeko's hand is roughly the size of the rectangular bar in our TWO BAR soap mould. Only problem with using a big rectangular wooden box mould to make this in is that you end up with loads of bars all in one go. Great if you are selling it - not so good if it is only for your own use !

Anyway, I melted some SLS Free opaque melt and pour soap base  (about 150g) and added some honey, milk and oatmeal fragrance along with a couple of big heaped teaspoons of locally produced runny honey and a little colouring.

 The darker the honey, the stonger the flavour. The honey I have at the moment is very light. It smelt good enough to eat - but unsurprisingly tasted a bit soapy (I KNOW - I just couldn't resist !!!)


For the first bar, I laid some bubble wrap on the bottom and then poured in the soap base, laying more bubble wrap on top. When it was set, I pulled the bubble wrap off.


As you can see, I could have done with adding a little more colouring and secondly using a NEW piece of bubble wrap rather than stealing a bit from the length Oliver currently has in his toybox for popping. What is is that makes popping bubble wrap so addictive ?


After that, I melted down some transparent melt and pour soap base and added a tiny bit of yellow colouring and some more honey. This was to pour over the top of the opaque base layer. Mine maybe is not so effective as Umeko's - but the transparent layer is sealing in the bubblewrap / honeycomb effect which will make it last longer and not wear the effect away so quickly. The colour shown above is what I used on my finished photo of the soap. The first attempt was a bit too orange.

I poured this over the top of the base layer after removing the bubble wrap. Once the soap was set, I released it from the mould and turned it over to repeat with the other side.

 The base layer took several times longer than normal to set - I actually ended up popping it in the fridge. I can only think that this was due to the bubble wrap causing and isulate layer. Amazing stuff bubble wrap. I've used it a few times in the past to wrap up hypothermic foals. It's literally a lifesaver.


The first attempt - just a bit too orangey on top. Looks ok in the photo - but it's really bright in real life and hides the honeycomb effect too much.

This soap is really yummy addictive. It's also very very slippy ! Ok - soap IS slippy - but I think this is really slippy and can only put it down to the honey. I adore it, it's beautiful to wash with. We've got one as a super big bath soap and I cut the other in half so Oliver can use it too. He loves the soap with "the bubbles in it" - but I've lost count how many times he's dropped it. It's that slippy he can't hang on to it washing his hands and drops his little bar 10x more often than a regular bar !


This is the second (lighter) coloured bar. I think the base layer needs to be a bit stronger coloured though, so I've got another hardening at the moment. This time I've added a little soy sauce to it too which is giving it a really nice caramel colour. I can't wait for it to finish hardening so I can pop it out !

Sarah-Jane Nash - http://www.siliconemoulds.com/ - silicone mould specialists - supplying worldwide

Dozen Egg and Ham Pie


If your chickens have gone into overdrive as mine have with the onset of Spring - this is the ideal pie to make ! Normally my husband (Steve) takes surplus eggs to his work with him and these are very quicky snapped up by his customers. However, he has forgotten the last couple of days and it is also a bank holiday weekend...

The chickens are laying us about 7 > 8 eggs per day. I've still got about two dozen sitting in the kitchen and that's before I collect todays ! This takes about an hour to make and an hour to cook - so set aside plenty of time. You could easily knock 20 minutes of prep off if you buy shop bought pastry.


I saw a recipe for a bacon and egg pie in last months Delicious Magazine and decided to change it about a bit. Btw, the clue is in the name - so don't go making this if you haven't got masses of eggs ! Ideal for picnics or a cold supper / lunch with a simply dressed salad. Serves around 10.

You need an 8" spring form tin for this pie

For the pastry :

350g plain flour
180g salted butter (cold and cubed)
little extra salt.

Either use a food processer to blitz the above to crumbs, or rub the fat into the flour with your fingertips until crumbs form. Add just enough cold water to be able to bring it to a dough. Alternatively, cheat and use a 500g of store bought - but it WON'T be the same !

Put 200g of the pastry aside and roll the rest out large enough to line an 8" tin with a little overhang.

If you have a silicone pastry / fondant rolling mat, rub in a tiny bit of Trex / vegetable shortening or similar if it is the first use aand simply roll. If you are just rolling on a normal worktop, you will need some extra flour. Here is a really rubbish video I did a week or so ago showing rolling sweet pastry which is far more fragile and delicate


PIE FILLING

12 eggs - the fresher the better !
400 > 500g of bacon or gammon offcuts, thinly sliced
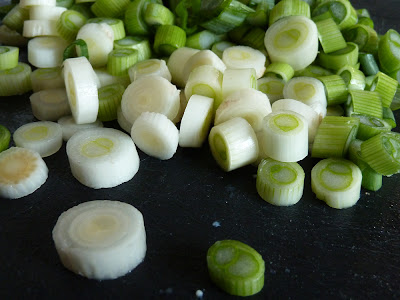
2 bunches of spring onions, chopped
2 tablespoons freshly chopped chives
2 tablespoons freshly chopped oregano
200ml double cream
1 teaspoon chilli powder (can be ommitted)

I used 460g of gammon offcuts from Tony Perkins - our local butcher. All his pork / gammon comes from the prizewinning Metfield herd. Gammon offcuts are amazing good value - the pack I had was 96p ! (about $1.55)

Slice these thinly and then fry until the edges are starting to turn golden and crispy. There was so little fat, I had to add a touch of olive oil to stop them sticking to my non-stick pan.


Once these are done, set aside and fry off the spring onions for about a minute along with the herbs.


Mix the spring onions and fried bacon / gammon pieces together. Put 2/3 of these into the pastry case.


Mix 200ml of double cream with two eggs and the white of one plus the chilli powder if using. There is hardly any chilli in this, it's for background heat only really without the grittiness of ground black pepper. Alternatively, you could use finely ground white pepper.... Put the remaining yolk aside. Pour about half of this over the bacon / gammon and spring onion mix.


Break NINE eggs on top of the bottom layer and then pour the remaining cream / egg mix on top.


Roll out pastry reserved for the top. Brush a little water round the pastry at the top of the case and lay the lid inside, pressing the two pieces together to seal. Trim round the top with a sharp knife.

Roll the top seam down and use a fork / spoon handle or similar to pinch it in .


Use the remaining egg yolk beaten with about 1tsp of water to glaze the pie.

Cook in a fan oven at about 170deg for 70mins. Remove and allow to cool before serving.

Sarah-Jane Nash - http://www.siliconemoulds.com/ - silicone bakeware mould specialists - April 11

Sunday 17 April 2011

Scones - Cheese Scones, Fruit Scones & a big update !


This post is specifically for Marie - who requested my cheese scone recipe after I took them to Sara & Max's Easter Egg hunt party on Friday. The children all had a super time and it was so funny to watch Oliver  and friends tearing round the garden at warp speed collecting eggs. For those of you that want to see the photos - you should be able to view them if you have a Facebook account . Sara's Easter Egg Hunt 15/4/11

Stupidly, I didn't take photos of Friday's scones, but since Victoria and Emma were coming over on Saturday.... I made some more.

Scones are best eaten on the day they are made - preferably still a little warm. Still - if there are any left a day or two later, try toasting them and spreading with butter. Cheese scones are awesome toasted and the cheese  melts again so they taste as good as they did straight out the oven.

Cheese Scone Recipe - makes 6 > 8

350g self raising flour
1/4 tsp salt
1 tsp baking powder
2 tsp mustard powder (omit if you prefer)
300g coarse grated strong cheese
175g milk
squeeze of lemon juice
60g butter
beaten egg (to glaze)


Preheat fan oven to 200deg C

Scones are so quick and easy to make that once you make them once yourself, you'll never go back to shop bought. I'm serious. I hadn't made scones in a year until last week, but I hadn't bought any either. Ok - that's a lie. I occassionally buy really cheap reduced / out of date ones for the chickens. They do love scones... but I refuse to make scones for chickens !

There are a few rules for making good fluffy scones that rise tall.

1. Grate your butter. Yes - sounds crazy. I think that was a tip I picked up off a Jamie Oliover program many years ago. It may seem mad - but it works like a dream. You want to work the dough as little as you possibly can. Grating the butter means it incorporates into the dough FAR faster.

2. Warm your milk. Just as you are ready to use it, give it a zap in the microwave. You want it nice and hot - but not too hot to touch.

3. Sour the milk with a squeeze of lemon juice (or use buttermilk). I normally use a little lemon juice. If you don't have any, vinegar would do. It doesn't need much !

4. Handle the scone dough as little as possible and get it in the oven as fast as you can. The addition of the warm / hot milk helps them rise from the inside.

In a large bowl, mix sieved flour, salt and baking powder. Rub in the grated butter until crumbs form. Keep a small amount of grated cheese back to decorate the tops, and toss the rest of the grated cheese through the crumbs. If you forget, it's no big deal. I often do and have to grate some more ..

I usually like to use EXTRA STRONG Mature Cheddar (Cathedral City) for scones - but the ones photographed were made using Applewood smoked.

Warm the milk and add it to the dry ingredients. Combine with a fork. Bring together with your hands. It will be very soft and a little sticky.

Tip out on to a work surface and pat it into a rough rectangle about 9" x 6" I guess. Try not to add any extra flour and handle the dough as little as you possibly can. Mine is normally about 1.1/2 > 2" thick (yes - before they go in the oven !)


I never ever roll my scone dough....and I never use cutters on it either. If you want to cut it into rounds, push the cutter the whole way down in one go. Don't twist / rotate the cutter as you do this - otherwise the scones don't rise nearly so well.

I simply cut into rectangles with a sharp knife. One single cut down and lift the knife out exactly the way it went in. I basically cut my rectangle into 3 and then each big piece into two.


Place on a baking tray lined with baking parchment - or use a silicone baking tray liner as shown above. Great things these are - save me a small fortune in baking parchment.

Brush the tops with beaten egg and then strategically place several strands of grated cheese on top of each one. You won't need much cheese on top (it's mainly decoration), and I promise you that these are packed with cheese on the inside.

Bake for 10 > 12 mins at 200deg C (fan)

For Fruit scones :

replace 60g butter with 85g.
omit the mustard and cheese (obviously !)
Add a good big handful of the plumpest raisins / sultanas you can find. Tesco does some really good ones.
Add 3 > 4 tablespoons sugar and 1 tsp vanilla

Well - it's been one heck of a week. THREE fires at the building behind us at work. I was working late on Monday night and went out to the car to get some paperwork. On going out the door, the smell of smoke hit me. On looking up, I could see our roof was smoking and the building behind was pouing smoke.

On running round the back of the building, there were employees from surrounding units pouring water along the ground where wooddust which had blown in the wind was lying and catching fire everywhere. The stack of pallets by the back of our building started to ignite. The moss on our roof and lying wood dust blown over from the sawdust factory was starting to burn.

I phoned the fire brigade who thankfully arrived quickly. They called in more help and there were 6 appliances on site and approx 36 fire crew. A couple of them spent a good two hours hosing our roof alone as they were worried about thermal hotspots. I'm just grateful that no damage was done.


I've got quite a lot of photos and some video clips that are far too long to load up on here. This was before the fire brigade arrived and the THIRD fire. Yes - you did read that right. There were an additional two further fires at this same property on Wednesday. The problematic machinery obviously wasn't fixed.... Thankfully on those occasions, the wind was blowing the opposite way and there was no risk to us.


I think by the time I took this photo, essentially the fire was out. Anyway, the fireman at the bottom of the ladder is Richard (one of my employees) who is also a retained fire fighter with Attleborough Fire Brigade. If it wasn't for local businesses letting staff remain on retention with the fire brigade, we wouldn't have a local fire service. I'll need to remember not to whinge too much when he gets a call out and has to make a rapid exit for a fire call..

Basically, I've been really held back this week due to various things that have to take priorirty - like fires for instance. I've got several parcels waiting to send to some of you guys / gals (who have offered some help) on my desk and will be sending several emails in the morning for addresses. A few have also already been sent - and one or two received already. Apologies for the late replies... it's been a very packed week !

Massive thanks to Ann Low of Ancoo Journal who send me an awesome parcel last week - full or agar agar and jelly molds to play with. I can't wait to have a go ! Do have a look at Ann's blog though - she really is the master of jellies and her photos are stunning :-)


I took a couple of hours out yesterday when my friend Victoria brought her little girl Emma to play with Oliver. For those of you who don't know, Emma and Oliver are the best friends in the whole wide world. I met Victoria outside nursery last autumn when for some unknown reason I offered her some newly laid eggs from our chickens that I had in the car... You meet people in the strangest of ways !

We took Emma and Oliver out for a walk. The joy of a sunny day and the outdoors.

Below : Catching Butterflies.


Best Friends.....


Beautiful cherry blossom,. Oh - how I'd love to visit and see cherry blossom in Japan. My thoughts go out to those in Japan after all their tradgedy of late.


Glorious sunshine - and then the rain came.


Really wierd. Glorious sunshine on one side and thick black cloud on the other. We made a quick dash for home....

Well - that's it for tonight. Got some photos using a new mould to upload tomorrow if time allows

Thursday 14 April 2011

Peanut Butter Cookie Cups - TWO Ways


Ok - hands up. I'm guilty !

I had serious fun fun fun making several things with this recipe and happily frittered last Friday night away simply "creating"....


The basis of this recipe came from BROWN EYED BAKER. Shucks - I've hardly changed it at all, but I have kinda reinvented it in a totally different way... and all of these came from just one batch of cookie dough.


I started with just the cookie dough and used 1/2 of it to make some really yummy cookies. If you want pretty cookie photos - do go and look at Brown Eyed Baker's  - mine are rather rustic ! They also spread quite a bit (which I wanted them to) and I cooked a little bit longer to get really crisp edges.


Here is the recipe I used

Peanut Butter & Snickers Cookie Dough

1.1/4 cups plain flour
3/4 tsp baking powder
3/4 tsp bicarbonate of soda
115g softened salted butter
1 cup crunchy peanut butter
3/4 cup light brown soft sugar
1/2 cup caster sugar
1 egg
splash of milk
1 tsp vanilla extract (homemade if you have it !)
4 Snickers bars - chopped (standard size)
3/4 cup chocolate chips

Cream the butter, sugars and peanut butter until smooth and creamy (apart from the nutty lumps that is !) Add the egg, milk and vanilla and beat again. Combine in the flour, baking powder and bicarb. Add a teeny bit more milk if needed.


Stir in the chocolate chips and chopped up Snickers bars.

Now - divide into 24 balls - all approx 50 > 55g. If you want cookies, space well apart on silicone baking mats / tray liners. If you want cookie cups, put them into a 12 hole standard sized cupcake / muffin mould and press into the edges so there is a hollow in the middle.


I really dont remember how long I baked them for. About 10 > 12 mins I think. The oven was 170deg and I baked them until the edges started turning golden brown.


In case you notice a rather BLUE thing going on here, you are right. I've had these in stock for a good few months. Customers keep asking me for muffin moulds and baking tray liners in blue - but I just had not got round to actually putting them on the website or taking photos.... 

When the cookie cups came out the oven, the middles were risen and almost level with the top of the mould. I slightly tapped the middle of each one, which caused them to fall and go back to a cup shape. I left these in the moulds to cool before turning out.


As this was a brand new mould, I lightly greased with butter before use. I don't generally find I have to flour dust moulds when using with cookie dough.. The cookie cups literally popped out.

These are super to serve slightly warm with a scoop of vanilla icecream, or cold with frosting in the centre.

I made chocolate buttercream and banana creme buttercream.

115g salted butter, 4 cups of icing sugar and 1/4 cup of milk. This needs to go in a stand mixer for at least 5 mins. I then split the batch into two. To one half, I added 3 or 4 tablespoons of cocoa powder. To the other half, I added 4 DROPS (yes - drops) of Lorann Candy Oil. The candy oils are seriously powerful stuff and come in teeny weeny 2.5ml bottles. You'll be surprised - this stuff goes a very long way !

You choose - frosting or icecream - which do you prefer ???

Sarah-Jane Nash - http://www.siliconemoulds.com/ - silicone bakeware / cake mould specialist cook shop

Redcurrant Muffins with Lemon Glaze


I made these a month or so ago and totally forgot I hadn't blogged them.

These redcurrant and lemon muffins are extraordinary. The lemon glaze is sweet but tangy and the redcurrants give a sour tang. You could eat these any time of the day. They taste light and refreshing and are a real burst of summer.

I was astonished Oliver had a go at these. He ate about 1/2 of one - which was good going for him. Right enough, he would have been begging for a second one if chocolate had been involved !

Last summer, I saw punnets upon punnets of redcurrants for sale on a fruit and veg stand by the side of the road. We are in a very rural area, and loads of people sell fruit, veg and eggs outside their door. You literally take what you want and put your money in a jar. Lovely. Fresh produce and usually very cheap. In autumn, EVERYONE seems to have apples and there are stacks of folk giving slightly imperfect ones away by the carrier bag full free. All you need to do is stop and pick some up

Sucked in by the lure of masses of redcurrants - freshly picked and on the vines, I doubled back to get some. I remember at the time getting about 4 or 5 punnets full and at the same time stupidly already realising I'd have no chance to use them over the following couple of days.

Just as well then that they froze so well ! I've had redcurrants there for sauces etc all through winter. Given masses still remained however, I can up with these on a rather damp and dreary winter day and it rather brightened things up.


Line a 12 hole silicone muffin mould (preferably hot pink to cheer up a gloomy day !) with paper cupcake / muffin cases. I like to use liners with delicate batters like this one and also when I am useing icings or glazes as it makes it a much less stick affair to both handle and eat the finished product !

Preheat fan oven to 200deg C

Recipe - makes exactly 12

275g plain flour (sifted)
3 teaspoons of baking powder
1/2 tsp salt
160g sugar
1 egg
250ml milk
100ml sunflower or vegetable oil
180g redcurrants

Add all dry ingredients together and combine with a fork

Add all wet ingredients together and combine with a fork

Add wet to dry, and mix with a spoon until it looks lumpy and almost combined. Throw in the frozen redcurrants during the last couple of strokes.

Spoon into the cases. Pop the silicone muffin mould (on top of a baking tray) into the oven and reduce temperature to 180deg C.

Cook for approx 20 > 25 mins until done. Remove from oven.

For the glaze, all I did was mix icing sugar with some lemon juice until a thick paste (tooth paste consistency) formed.  Spoon this on to the hot muffins and it will melt to form a simple glaze


Enjoy !

Sarah-Jane Nash, http://www.siliconemoulds.com/ - silicone bakeware specialists