Thursday, 6 May 2010

Butternut Squash and Goats Cheese Pie


This is a fabulous recipe for a party or a special meal. It's vegetarian and still packs a punch with flavour... so much so that it's demolished quickly by vegetarians and meat eaters alike when I make it.

One large 8" pie (it's DEEP) will easily serve 8 > 10 people. If you really enjoy this like I do - you can also make it in small individual pies. (see further down)

This recipe originated from Delicious magazine - but the quantities they stated simply did not fit the tin and I had masses of extra. That's how my individual pies were born ! The recipe below has been adaptedd to perfectly fit an 8" dia deep cake tin.

Recipe

Pastry :

350g plain flour
50g coarse polenta
150g cold butter
60g parmesan (grated)
1 egg, beaten

Put pastry ingredients in a food processor and blitz to crumbs. Add a little water until it starts to form a dough. Remove from food processor and knead to form a ball. Wrap in cling film and rest in fridge for 30 mins or so. Remove 1/3 and set aside for pastry lid. Line tin with remaining pastry

Filling :

1 large butternut squash - about 1.2kg
4 tsp La Kama spice blend from Seasoned Pioneers
1/2 tsp chilli flakes
4 garlic cloves (whole)
large bag young spinach leaves
200g goats cheese log (rindless)
3 large red onions (thinly sliced)
tub riacotta
100g pine nuts

Peel and deseed squash. Slice squash and lay on baking trays. Don't forget to use silicone tray liners if you have them - makes washing up easy ! Drizzle with olive oil and then sprinkle over the spice blend and chilli flakes. Season well with salt and pepper.

 Pop the garlic cloves (whole) onto one of the trays. Bake in the oven at about 180deg C for 25 mins until golden

Wilt the spinach and squeeze out all excess water. Finely chop and mix this with the riacotta.

Carmelise the red onions in a pan with some olive oil and mash in the roasted garlic

Once all components are ready - layer the pie case with riacotta / spinach mix, squash, red onions, goats cheese (crumbled) and pine nuts. I started with a butternut squash layer - but you could start with whatever layer you fancy. Repeat until case if full.

Seal case with remaining pastry made into a lid. Decorate with pastry leaves or other design and leave a little hole for steam. Brush with beaten egg

Bake at 180deg C fan for approx 40 mins
We do an extra deep muffin mould which is ideal for single pies. The sides are almost vertical.I use it for pork pies and individual small pies. I then wrap the pies in the mould with foil and freeze. You can then either thaw them all and cook together at a later date... or like me - cut it into 3 lots of 2 cells which lets me cook just two at a time !


This 6 cell extra deep silicone muffin mould has been out of stock for some time now - but is due to arrive back in the next few days - this time in a purple colour. You will find it on our website at http://www.siliconemoulds.com/ later this month


Sarah-Jane Nash, Siliconemolds.com - silicone bakeware - May 2010

Salted Cashew & Caramel Bars

These are lots of things - especially things you wouldn't expect. They are bursting with flavours and textures.

Crunchy, chewy, sweet, salty and nutty. One will NEVER be enough !

I made these last week.... and there are none left ! In my defense, I was very good and did only have one... but several people had rather more. You know who you are ..... :-P

This recipe originated from The Sweet Melissa Baking Book - but I've changed it somewhat to make it mine. It's a tray bake and very easy. Ideal for cake sales or charity events as not only is it seriously tasty - but you can prepare a batch and chop it into portions. It still looks lovely.

My original portions as per photo above were too big - I'd recommend halving them. One lasagne / tray bake silicone mould cut into 12 squares - but this would have been far better as 24 finger sized bars. It also yeilded 4 x mini loaf mould sized bars (each of which I cut into two squares to match the size of the other ones)

The only thing I can fault it on is that my base was too thick. Next time, I'd use 2 x lasagne / tray bake moulds and up the topping by 25%.

Recipe

Base :

250g salted butter
1/2 cup dark brown soft
1/2 cup caster sugar
2.1/2 cups plain flour

cream butter and sugars. Add in flour until a soft dough has just formed. Press into your tins / trays and prick all over with a fork. If using silicone trays - no need to oil or grease at all. If traditional tins, line with greaseproof paper and grease.


Cook at 180deg C for about 30mins if using 2 x silicone lasagne tins - or 40 mins if using one and 4 x mini loaf moulds as I did. The base should just be starting to colour when it's ready.


Topping

200g milk chocolate
1 cup golden syrup
6 princess (or other brand) marshmallows
6 tablespoons of double cream
2.1/2 of salted cashews - I used Sainsbury's budget range (all 1/2's)


Add all the items except the nuts to a saucepan on a low heat. Melt the ingreditents together, stirring all the time. 

 As soon as it gets to simmering point, take it off the heat and pour into the prepared trays on top of the hot base. Scatter the nuts on top.


Return to the oven for approx 5 mins.

Allow to cool in the tin or tray before turning out and chopping into bars. ( I made mine in the evening and popped in the fridge when cool to do the chopping up in the morning !)


Sarah-Jane Nash, http://www.siliconemoulds.com/ - May 2010

Thursday, 29 April 2010

BLOG GIVEAWAY - SET OF 4 FLOWER SILICONE MOULDS


Inese has sent me some beautiful photos which basically show a step by step guide to making hand made chocolates using our silicone moulds. Our moulds are all suitable for the oven and freezer with a temperature range of + 230deg to - 40 deg CELCIUS. That's rather hot and seriously cold !!!!

These moulds are perfect for making little flower hand made chocolates, guest soaps or little candles. They make the ideal wedding favour, birthday, Christmas or thank you gift.

You can also use them for butter for pretty summer tea parties - or to make classy ice cubes. Use them for tiny little cakes too :-)

Each one of these 4 moulds - rose, sunflower, chrysanthemum and flower have 15 cells. They're very flexible and easy to unmould. 

I'll put Inese's photo guide to chocolates on the website for anyone who wishes to look.


To be in with a chance of winning, please post on my blog what you would make with the moulds. The tastiest or most inspiring idea will win. I'll keep it open for a week.....

Good Luck !

Sarah-Jane Nash - http://www.siliconemoulds.com/ - flexible silicone bakeware. April 2010

Wednesday, 28 April 2010

I Love Cherry Pie !


I do LOVE pie.

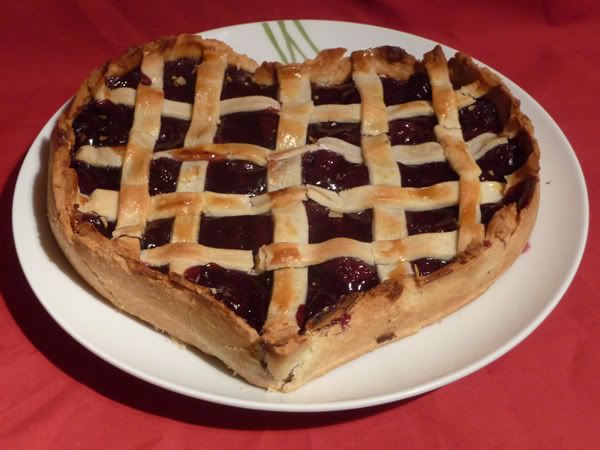
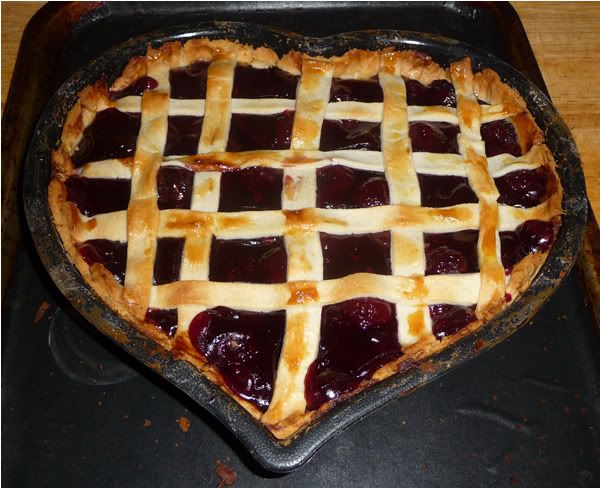
It's been a while - far far too long since I last made cherry pie. The longing took over, and as fresh cherries are not currently in season or readily available - I decided to make one with tinned cherries in my lovely heart shaped silicone mould.

This was actually very easy to do - especially as I cheated and used pre-made sweet / dessert shortcrust pastry.

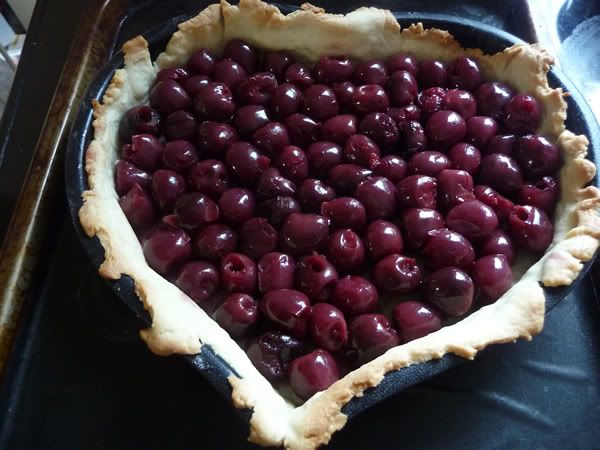
First of all - line the mould with pastry and grease proof paper. Fill with baking beans (or dried rice) and blind bake for 10 to 15 minutes.

Recipe for Filling

2 cans of stoned cherries
juice of the cherries
4 tablespoons of corn flour
2 teaspoons of cinnamon
6 tablespoons of granulated sugar

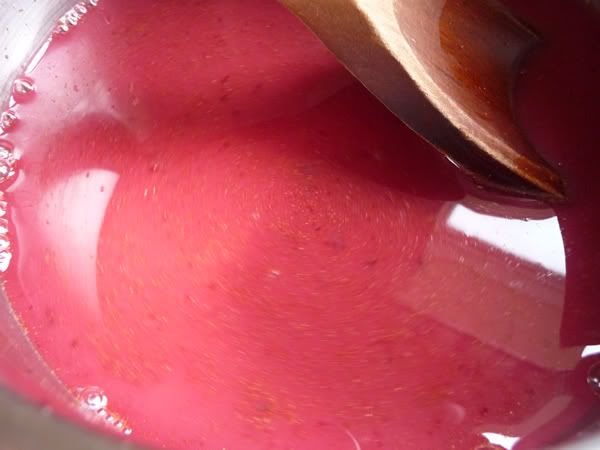
Mix cornflour and cinnamon with a little cold water. Add in a small small saucepan along with the sugar and juice from the tinned cherries.


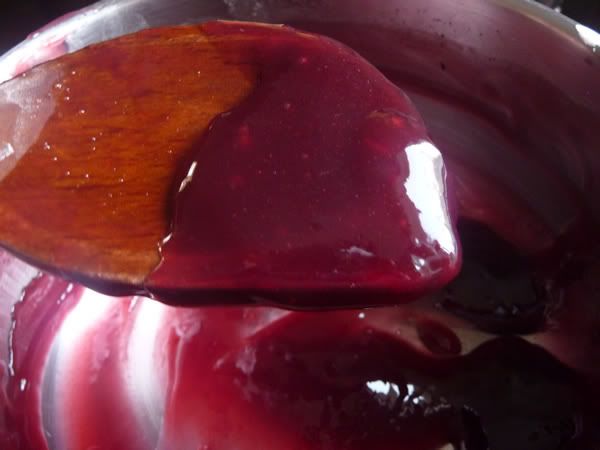
Bring up to a simmer (stirring constantly) until mixture is of a thick consistency - similar to wallpaper paste.


Put the cherries into the pastry case and pour filling on top.


Top with pastry (either lattice or full pastry lid) and bake at 200deg C for approx 20 mins.


Allow to cool before turning out.


Sarah-Jane Nash, SiliconeMoulds.com - flexible silicone bakeware. April 2010

Tuesday, 27 April 2010

Tzatziki - Greek Style Dip


Tzatziki is a Greek dish - typically served as a dip with crudites or tortilla chips. Alternatively to accompany a meal.

Unlike the watery stuff you buy in little tubs in the supermarket, the real thing should be rich and creamy and cooling. It's very simple and cheap to make. A simple tub of Greek yoghurt in the fridge only takes a few minutes to turn into something with plenty of flavour and a joy to have alongside some salad.

There is no official recipe as such - much of it has to be to eye and taste

250g tub of Greek Yoghurt
3" long piece of cucumber
lemon juice
mint leaves
2 x large cloves of garlic

Tip the greek yoghurt into a bowl.

Peel the cucumber. Cut in half and scoop out the seeds. Cut each half into half again (lengthways) and finely slice. Add this to the bowl.

Take a good few mint leaves and finely chop. I like about 2 tablespoons in volume.

Press or finely mince the garlic and add to the yoghurt with the mint. Mix these in well. Add lemon and seasoning to taste - 2 > 3 teaspoons of lemon is about right...

So very simple !


Sarah-Jane Nash, http://www.siliconemoulds.com/ - flexible silicone bakeware moulds. April 2010

Thursday, 22 April 2010

Ale and Cheese Easy Bread (no knead !)


This recipe is adapted from Guinness and Irish Cheddar Easy Loaf - from the March 2010 edition of the Country Kitchen Magazine

I did make the original - but Guinness is too strong for my liking and I changed the flours too.

Makes one 20cm (8") round loaf. Next time, I'll double the recipe and make in a 10" round silicone mould. It's EXTREMELLY good and so so so easy to make. I've brought 1/2 of it (left from last night) in today and it's been demolished and given a big thumbs up :-) I'm sure if you make it, you'll enjoy it too.


250ml Newcastle Brown Ale
250g self raising flour
100g wholemeal flour
1tsp of baking powder
60g caster sugar
100g strong, mature cheddar
2 tbsp of butter

Preheat oven to 180deg (350deg F)

Put all ingredients except the butter in a bowl and combine well with a spoon. It looks a bit like cooked porridge !

Scrape into an 8" round silicone bakeware mould with no need to grease (we've got these coming in May) or into a buttered, non-stick tin. Leave in a warm place for 30mins.

Original recipe says to bake for 35mins, drizzle with butter and return to oven for 10mins. My bread was totally cooked after 35 mins and I rubbed the solid butter over the top.

It had a lovely crispy and chewy outer. It's quite a dense bread and slightly sweet. Lovely warm or cold simply with butter - or the lads had the remains today with cheese

Sarah-Jane Nash, Flexible Silicone Bakeware Moulds - http://www.siliconemoulds.com/

Thank you Grannny !!!!


My Mum has been MONTHS knitting a little jacket for Oliver and was worried that he's grown so much it wouldn't fit.

Well - his jacket arrived in the post on Monday and has all these really CUTE little Peter Rabbit buttons on it. Oliver got rather excited opening it ! It also fits perfectly.

Today has been such a glorious morning (but with a bit of a chill in the air) - so I had a little bit of a photo shoot for Granny after Oliver fed the chickens :-)


I can't tell you how many dozen photos it took to get some usable ones - Oliver is so quick and doesn't stay still for two seconds.