Thursday, 29 April 2010

BLOG GIVEAWAY - SET OF 4 FLOWER SILICONE MOULDS


Inese has sent me some beautiful photos which basically show a step by step guide to making hand made chocolates using our silicone moulds. Our moulds are all suitable for the oven and freezer with a temperature range of + 230deg to - 40 deg CELCIUS. That's rather hot and seriously cold !!!!

These moulds are perfect for making little flower hand made chocolates, guest soaps or little candles. They make the ideal wedding favour, birthday, Christmas or thank you gift.

You can also use them for butter for pretty summer tea parties - or to make classy ice cubes. Use them for tiny little cakes too :-)

Each one of these 4 moulds - rose, sunflower, chrysanthemum and flower have 15 cells. They're very flexible and easy to unmould. 

I'll put Inese's photo guide to chocolates on the website for anyone who wishes to look.


To be in with a chance of winning, please post on my blog what you would make with the moulds. The tastiest or most inspiring idea will win. I'll keep it open for a week.....

Good Luck !

Sarah-Jane Nash - http://www.siliconemoulds.com/ - flexible silicone bakeware. April 2010

Wednesday, 28 April 2010

I Love Cherry Pie !


I do LOVE pie.

It's been a while - far far too long since I last made cherry pie. The longing took over, and as fresh cherries are not currently in season or readily available - I decided to make one with tinned cherries in my lovely heart shaped silicone mould.

This was actually very easy to do - especially as I cheated and used pre-made sweet / dessert shortcrust pastry.

First of all - line the mould with pastry and grease proof paper. Fill with baking beans (or dried rice) and blind bake for 10 to 15 minutes.

Recipe for Filling

2 cans of stoned cherries
juice of the cherries
4 tablespoons of corn flour
2 teaspoons of cinnamon
6 tablespoons of granulated sugar

Mix cornflour and cinnamon with a little cold water. Add in a small small saucepan along with the sugar and juice from the tinned cherries.


Bring up to a simmer (stirring constantly) until mixture is of a thick consistency - similar to wallpaper paste.


Put the cherries into the pastry case and pour filling on top.


Top with pastry (either lattice or full pastry lid) and bake at 200deg C for approx 20 mins.


Allow to cool before turning out.


Sarah-Jane Nash, SiliconeMoulds.com - flexible silicone bakeware. April 2010

Tuesday, 27 April 2010

Tzatziki - Greek Style Dip


Tzatziki is a Greek dish - typically served as a dip with crudites or tortilla chips. Alternatively to accompany a meal.

Unlike the watery stuff you buy in little tubs in the supermarket, the real thing should be rich and creamy and cooling. It's very simple and cheap to make. A simple tub of Greek yoghurt in the fridge only takes a few minutes to turn into something with plenty of flavour and a joy to have alongside some salad.

There is no official recipe as such - much of it has to be to eye and taste

250g tub of Greek Yoghurt
3" long piece of cucumber
lemon juice
mint leaves
2 x large cloves of garlic

Tip the greek yoghurt into a bowl.

Peel the cucumber. Cut in half and scoop out the seeds. Cut each half into half again (lengthways) and finely slice. Add this to the bowl.

Take a good few mint leaves and finely chop. I like about 2 tablespoons in volume.

Press or finely mince the garlic and add to the yoghurt with the mint. Mix these in well. Add lemon and seasoning to taste - 2 > 3 teaspoons of lemon is about right...

So very simple !


Sarah-Jane Nash, http://www.siliconemoulds.com/ - flexible silicone bakeware moulds. April 2010

Thursday, 22 April 2010

Ale and Cheese Easy Bread (no knead !)


This recipe is adapted from Guinness and Irish Cheddar Easy Loaf - from the March 2010 edition of the Country Kitchen Magazine

I did make the original - but Guinness is too strong for my liking and I changed the flours too.

Makes one 20cm (8") round loaf. Next time, I'll double the recipe and make in a 10" round silicone mould. It's EXTREMELLY good and so so so easy to make. I've brought 1/2 of it (left from last night) in today and it's been demolished and given a big thumbs up :-) I'm sure if you make it, you'll enjoy it too.


250ml Newcastle Brown Ale
250g self raising flour
100g wholemeal flour
1tsp of baking powder
60g caster sugar
100g strong, mature cheddar
2 tbsp of butter

Preheat oven to 180deg (350deg F)

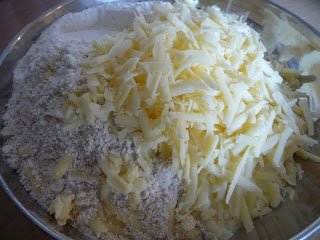
Put all ingredients except the butter in a bowl and combine well with a spoon. It looks a bit like cooked porridge !

Scrape into an 8" round silicone bakeware mould with no need to grease (we've got these coming in May) or into a buttered, non-stick tin. Leave in a warm place for 30mins.

Original recipe says to bake for 35mins, drizzle with butter and return to oven for 10mins. My bread was totally cooked after 35 mins and I rubbed the solid butter over the top.

It had a lovely crispy and chewy outer. It's quite a dense bread and slightly sweet. Lovely warm or cold simply with butter - or the lads had the remains today with cheese

Sarah-Jane Nash, Flexible Silicone Bakeware Moulds - http://www.siliconemoulds.com/

Thank you Grannny !!!!


My Mum has been MONTHS knitting a little jacket for Oliver and was worried that he's grown so much it wouldn't fit.

Well - his jacket arrived in the post on Monday and has all these really CUTE little Peter Rabbit buttons on it. Oliver got rather excited opening it ! It also fits perfectly.

Today has been such a glorious morning (but with a bit of a chill in the air) - so I had a little bit of a photo shoot for Granny after Oliver fed the chickens :-)


I can't tell you how many dozen photos it took to get some usable ones - Oliver is so quick and doesn't stay still for two seconds.

Sklandu Rauši - Latvian Carrot Tarts - GUEST POST


One of our regular customers, Inese from Latvia, makes the most scrummy looking things and often sends us photos.

These little carrot tarts are one of her latest and Inese has kindly sent me the recipe and photos which you can find below. These are made in a 12 hole standard silicone bakeware muffin / cupcake mould.

I am sending you the recipe of those carrot filled tarts! I make them without any grams or milligrams, just "on eye and taste", but there are some amounts named just not to be too approximate. but you know - cooking is the art of practice!

Latvian meal: Sklandu rauši - rye crust little tarts with carrot filling.
They’re not very sweet, relying primarily on the natural sweetness of carrots, but can be made as sweet as one likes.
There are a lot of variations, including potato versions and mixed-potato/carrot versions, but this time I went with 100% carrot.
tart base:

250 g rye flour
100 g warm water
sugar
salt
30 g butter or margarine.
Sift flour onto a pastry board, rub through butter or margarine. Melt sugar and salt into water, add and knead into a stiff dough that can be easily rolled.

Carrot Filling:
400 g carrots, peeled and cut into large chunks
50 g sugar
salt
25 g sour cream
2 eggs
15 – 25 g flour
vanilla bean

Boil carrots until tender. Drain well and pat dry. Chop in a food processor, food mill or ricer (I like when it is more rough, with small pieces of carrots). Combine sugar, salt, sour cream, eggs, vanilla seeds and flour with the carrots. If your carrot fill comes out overly wet, you may need more flour or to drain off a bit of the carrot juice so that it is somewhat dry.

Set aside.

Preheat the oven to 200oC.

Preparing the tarts.
Take muffin silicone mould. Using your fingers, fill each hole with a little ball of dough and roll it as thin as possible making “baskets”.
Bake for a while, some 5-10 minutes, until they become somewhat hard.
Spoon the carrot mixture into each little dough “basket” until it almost reaches the top. Bake for 10 – 15 minutes until the dough is crumbly and the carrot filling is browned a little.


Then take out of silicone and brush each top with beaten egg, mixed with sugar and sour cream, put into oven without silicone for some another 5-10 minutes to make the dough crispy from the bottom as well.

Sunday, 18 April 2010

Fresh Mint Frosting - Mmmmm !


Yesterday, I had made some chocolate cupcakes for a friend and was scratching around for a fresh and summery frosting recipe. I couldn't find anything I fancied putting on these. Lemon and orange certainley have a zing - but don't really go with chocolate. Vanilla - ok - bit boring. Chocolate - too heavy.

The back door was open and there was a beautiful smell from the fresh mint I'd newly planted.

I decided to have a go incorporating it into a frosting.


Actually - I was far from sure this was work. I envisaged the mint turning brown or being chompy in the frosting. I couldn't have been more wrong. I'm thrilled with how this one turned out.

It's fresh and fragrant and ever so subtle. It went with chocolate cake and it would equally go with lemon or apple. I fancy having a go at trying a basil frosting sometime soon to go along with a lemon or lemon poppy seed cake.

There is no recipe as such.

Very finely chop a couple of tablespoons of fresh mint. Make a very basic cream cheese icing and mix it in. I like to use soft cheese like Philadelphia and mix in standard icing sugar until I reach a nice thick consistancy.... then beat well. When ready to use, mix in the chopped mint well. I did this by hand.

The remains kept well overnight in a bowl covered with clingfilm  - and was spread on slices of left over spiced apple cake !!!

BIG Cake - Spiced Apple Cake


For some reason, I didn't expect this cake to turn out so huge. Nor did I expect to have my worst baking day ever on Friday and throw 3 lots of cake in the bin in frustration !

Friday just WASN'T my day ... I started off making a carrot cake in a 10" round silicone mould, which is a core recipe I use often for large cakes and muffins. It turned out beautifully as per normal. I then made a spiced pineapple and coconut cake to put on top to layer with. That would have been perfect. It looked fab by eye - but on turning out, wasn't quite cooked and the whole thing disintegrated in front of me. This was made worse by the fact I was trying to turn out on to the top of the iced carrot cake. The whole thing was then a complete write off and ended up in the bin. Teach me not to test it when taking out the oven !

Third cake was another spiced coconut and pineapple concoction..... BUT I forgot to put in the eggs. My 3rd disaster !

By this point, I'd run out of both pineapple and coconut. It was just as well we had a glut of eggs and the chickens had done us proud :-P

Attempt 4 created a spiced apple cake which turned out truly yummy and was demolished by office staff on Saturday morning. There was still stacks of it left and that came on a Saturday afternoon picnic to the park with my friend (Nicky) and our toddlers. There was so much of it - that we shared it with other visitors to the park too ! After all - they'd be mad to turn down cake, wouldn't they ?


I made this in a new mould we have in manufacture which should be available at the end of May. It's a large sunflower silicone bakeware mould with double layered petals for extra effect. It looks stunning plain or dusted with icing sugar - you really don't want to do much to it at all.

The Large sunflower mould is just over 10" internal diameter and recipe volumes to suit a standard 10" bundt ring mould / tube pan fit perfectly.


You'll see I've just added all the new moulds coming in May to the website - these are not yet available and I need to work through measurements, weights etc when they arrive.

Recipe

Ingredients

300g cooking apples - peeled, cored and small diced
2 tablespoons white sugar
2 tablespoons ground cinnamon
1 tsp nutmeg
2 tsp ground ginger


375 g all-purpose flour
3 tsp baking powder
3/4 tsp bicarbonate of soda
1/2 tsp salt
400g granulated sugar
250 ml vegetable oil
60ml milk
3 tsp vanilla essence
4 eggs
1 cup chopped walnuts or pecans (optional)

icing sugar for dusting
 
Preheat oven to 180deg C (fan)
 
In a medium bowl, mix the chopped apples, spices and sugar and set aside.
 
In a large bowl, beat the wet ingredients. Sift in dry ingredients and beat on low with electric mixer until all combined.
 
Pour 1/3 of the cake batter into the mould or tin. It's wise to grease brand new silicone moulds for the first time - especially if the cake mix has a high sugar content. The sugar wasn't too bad in this one, so I didn't bother and it came out just fine.
 
Mix the apples into the remaining batter and pour into the mould. The reason I've done this is to get a nice smooth top to the cake after turning out - rather than bits of apple spoiling the look of the top of my cake.
 

This will take 1hour to cook in a 10" tube / bundt pan - or approx 1hour 20 mins in a standard circular cake mould / tin.

Allow to cool until warm and then turn out on a wire rack. When totally cool, dust with icing sugar or glaze as required. Easily serves 12 > 14

This cake eats even better on day 2. My little cake tester (Oliver) had a bit of the cut slice on the Friday afternoon to give it a seal of approval and the rest sat waiting until Saturday. It was definately best the next day after the apples had a chance to release some more moisture. I'm afraid there are no photos of the cake in the park !


Sarah-Jane Nash - http://www.siliconemoulds.com/ - April 2010

Friday, 16 April 2010

Bacon and Thyme Savoury Muffins


I made these breakfast muffins last Sunday for a neighbour and they turned out really well.

They're savoury rather than sweet - but lots of flavour and lovely served warm with some herby butter.

60ml olive oil
1 chopped onion
pack streaky bacon rashers
10oz plain flour
3 tsp baking powder
1 tbsp baking powder
1/2 tsp salt
2 large eggs
230ml milk
2 tbsp chopped thyme
2 tbsn chopped parsley

Preheat oven to 180deg C Fan

Fry the onion until soft and set aside. Chop 2/3 of the pack of bacon and fry until crispy. Keep 4 rashers of streaky bacon aside and fry whole until crispy.

Combine dry ingredients and add wet ingredients. Mix until just combined. Add the bacon and onion in last few strokes.

Spoon into a 12 standard silicone muffin mould - with or without paper cases. Place 1/3 of a rasher of streaky bacon on top of each muffin. 

 Bake for approx 20mins until skewer comes out clean.


When hot, brush tops with melted butter. Serve warm, with herby or normal butter.


Monday, 12 April 2010

Spinach & Ricotta Gnocchi


This recipe caught my eye in the latest (May) BBC Good Food Magazine.

My pictures really do it no justice - the greens are beautiful and vibrant and seriously catch the eye. Plenty of flavour too. I'd been meaning to try making gnocchi for a while and decided I'd have a bash at this. It's not got potato in it so is very light in texture. I also decided to dress it with some roasted pine nuts as well as the rocket and olive oil for a little extra bite.


Cooking time is very minimal and it's far easier than I would have imagined. Do note though, that it needs about 30mins to chill in the fridge before cooking.

200g / 8oz young spinach
small handful of parsley - finely chopped
1 clove of garlic, crushed
85g / 3oz plain flour
2 eggs
100g / 4oz parmesan, freshly grated
good pinch grated nutmeg
olive oil and rocket to serve

Boil the kettle. Place the spinach in a large bowl and pour boiling water over it. Leave for 2 mins until wilted, then drain thoroughly. Leave to cool, then wrap a clean tea towel around the spinach. Squeeze out as much water as possible over the sink. Finely chop.

Place the spinach, parsley,garlic, riacotta,eggs,cheese, and nutmeg in a bowl and mix well with a fork until all combined.


Using wet hands, form walnut sized balls and then chill in the fridge for 30 mins on a large plate or tray.


When ready to cook, bring a large pan of water to the boil. Reduce heat to medium and drop the gnocchi in in batches. They will sink to the bottom. When they bob to the top, cook for about 1 minute more. It says to cook about 8 at a time - but I had no problem cooking this in two batches.

Remove with a slotted spoon. Serve drizzled with olive oil and scatter with rocket and some more parmesan


Sarah-Jane, http://www.siliconemoulds.com/ - April 2010


Sunday, 11 April 2010

Mushroom and Ham Pie


I'm so behind in blogging this last week. Oliver has been very poorly and we've barely been out of the house until today.

This was a quick fix meal from earlier in the week. Tasty enough with loads of flavour - but not exactly "wow" in looks. I served with red onions braised in red wine. There were far too many onions actually !

I cooked this in a 2lb silicone loaf tin mould - which is a really universal piece of silicone bakeware that I use for many different uses in my kitchen


Recipe

500g thinly sliced mushrooms
4 rashers of back bacon, chopped
tablespoon fresh thyme leaves
1 clove of garlic (finely chopped)
1/4 tsp salt
1/4 tsp cracked black pepper
75ml red wine
2 tbsp double cream
packet of puff pastry

Roll the pastry out to line the loaf tin, letting excess overhang the sides. Refrigerate until ready to use. Fry bacon bits until crispy and set aside. Fry mushrooms with garlic in batches until a little undercooked, but shrunken. Add all mushrooms and bacon back to the pan with the thyme and seasoning. Add wine and reduce on a medium heat. Add cream on a low heat and stir until thickened.

Use this as filling for the pie. Trim pastry and fold long sides over each other (selaing with eggwash) to make equivalent of an envelope.


Cook at approx 200deg C in a fan oven for 40mins of until cooked and golden.

Sarah-Jane Nash, http://www.siliconemoulds.com/ - April 2010

Lemon Drizzle Cake


I always think that lemon drizzle cake tastes like summer on a plate. I love the sharp lemony zing :-)

The recipe below will make a tea loaf in a 2lb silicone loaf mould or 5 x mini loaf size cakes . With a traditional non-stick tin, you are advised to line the bottom of this with paper and grease the sides. Same goes for silicone as after adding the sugary syrup bit it gets very moist and may stick a bit to the bottom. I took them out the moulds hot, drizzled the syrup on and then popped them back in to cool off... but to make removal after adding the syrup adding bit easier, I'll do the paper on the bottom bit next time.

175g self raising flour
175g butter (or margarine)
2 large eggs
60ml milk
175g caster sugar
zest of 1 or 2 lemons

For the syrup :

juice of 2 lemons
4 table spoons granulated sugar

Cream butter and caster sugar until pale and fluffy. Add lemon zest and beat in eggs one at a time. Sift in flour - beating only until combined. Add milk and combine.

Put into a greased non stick 2lb loaf tin or silicone bakeware mould for one large cake - or 5 mini loaf silicone moulds.The base/s should be lined with baking parchment or greaseproof paper.

Bate at 180deg C in a fan over for 55 mins or until done. For mini loaf moulds, these take about 18mins.


For the syrup....

Place the lemon juice in a small pan and reduce to half. Add the sugar and boil until sugar is dissolved.

When cake / cakes are hot and just out the oven, prick the cake over the top with a skewer and pour on syrup. Allow to cool before serving

Tuesday, 6 April 2010

Baby Chicks - Just In Time For Easter


This little lot arrived on Friday last week. 30 little cheeping day old chicks.... Actually - 12 were for a friend and those left on Sunday, so 18 little chirpy cheeps left here.

Oliver now "bok boks" like a chicken and "cheep cheeps" like the chicks. He's fanatical about the chickens in our garden and also about tractors. I think he's going to grow up a real little country bumpkin.

I did make Easter dinner and take it with us to my in-laws yesterday - but it was a bit manic packing and taking a 1/2 cooked roast etc. I cooked pudding there. The pudding was to die for and I really do wish I'd had the camera with me to take photos.

Very easy, self saucing sticky toffee pudding. Definately one I'd do again !

You can find the recipe for Nigella Lawson's Sticky Toffee Pudding here. Yum yum yum....

Saturday was an Easter Egg Hunt followed by painting at Sara's with the babies.


Oliver WAS collecting chocolate - but also has a dog's ball in his bucket !

You can see the mess that followed here - Little Painters ..... BUT

It gets WORSE Little Painters Pt 2 .....

Sunday was a little cleaner. Daddy was out playing with landrovers - so Oliver helped with the chickens and real eggs down the field.


Hope you all had a lovely Easter xx

Sunday, 4 April 2010

Cake Display - isn't it stunning ?


One of our purchasers of a CAKE silicone bakeware moulds has been making some stunning and unusual display pieces as pictured above. We think they're really clever ! You can find them in her Ebay Shop if you want to have a look along with other shabby & chic items.


The Cake (word) mould has been SO popular, that we're pleased to announce we'll be introducing more words moulds in the coming months. We're starting to produce HAPPY, BIRTH and DAYS moulds - so you'll be able to make several longer word cakes - such as CAKE DAYS, HAPPY DAYS, HAPPY BIRTHDAY, BIRTHDAY CAKES, PAY DAY amongst others. We're hoping that these new words moulds will be available from early July.

Garlic Tear and Share Bread


Blogger has been a real pain today and I've struggled for ages to get my photos to load - almost to the point of giving up !

Anyway, I decided to make a Garlic tear and share type bread on Friday and it turned out really well. The prinicples are the same as any other bread.

I made a basic bread mix according to the bread flour bag instructions. Strong Bread Flour, water, yeast, salt and sugar. Kneaded, covered and set aside in a warm place to rise to double in size.

After first rise, pinch off pieces of dough approx 1/2" to 1" dia in size. I dunked these into 50grams of melted butter mixed with 50mls of olive oil with 3 cloves of finely minced / crushed garlic. Then, all the balls went into a 10" round silicone bakeware mould.


I sprinkled some chopped chives over the top along with some thin shavings of butter.


This then went to sit in a warm place for a second rise. At this time of year, our kitchen isn't warm enough unless the oven is on. It's therefore ideal to make bread at the same time as a good old roast... I take the grill out of the top oven and put my bread dough in there to prove in a bowl on top of a rack. The heat from the oven below gets it going nicely.


Just before baking, I decided to crumble a little cheddar cheese over the top. The butter had nicely melted over the top. I baked at 180deg in a fan oven for a little over 15 mins. On taking out, brush some melted butter over the top.

This was easily enough to do 6 > 8 people. We only used 1/2 between 3 of us alongside some casserole. Next time, I think I'd make in 2 x 2lb loaf tins - so I could par-bake one and freeze for another day.

Truly yummy treat though ! You'll need to take my word on it - I had so many photos that I thought I'd delete all the ones I didn't need. I forgot though that I hadn't reduced and saved any BAKED photos though and mistakenly deleted all of those from my camera card - so I can't show you how good it looked baked....

It was moist, buttery and very garlicky. Mmmmmmm

Sarah-Jane - http://www.siliconemoulds.com/ - April 2010